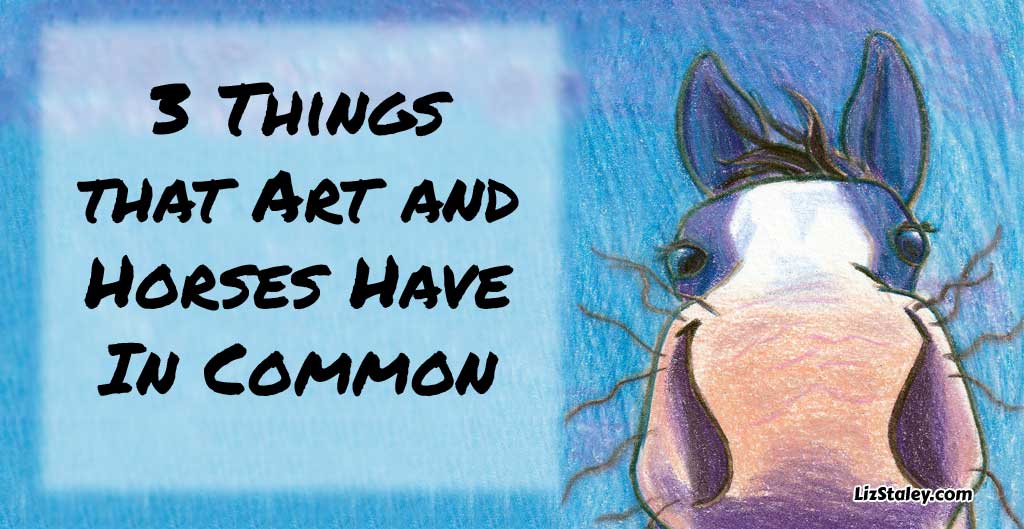
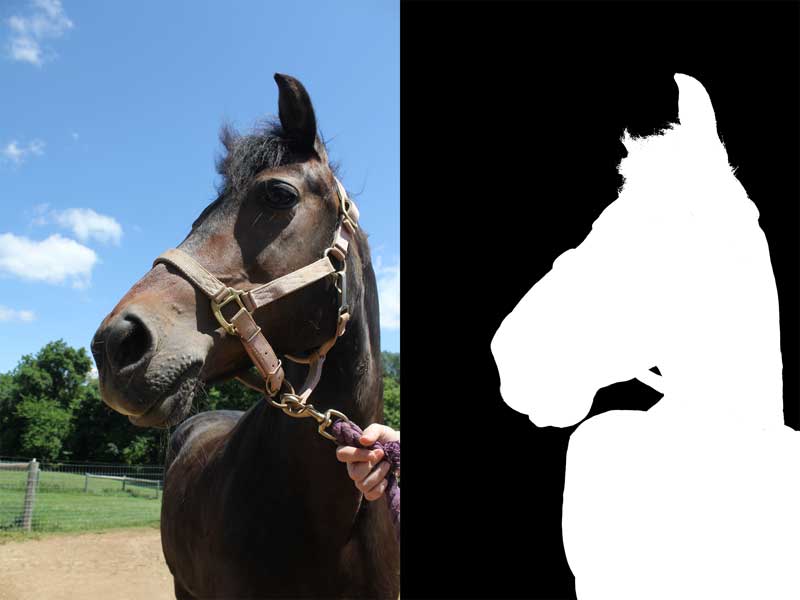
If you know me or you’ve spent any time at all on this website, then you know that two things are really important to me: horses and art. Some people would think that those things weren’t alike at all, but they have more in common than you’d think! In my opinion, they are very much alike, and here’s three reasons why I think so!
1. You’ll never know everything there is to know about either.
I get bored and lose interest in things pretty easily, unless there’s something more to learn about that thing. If I get interested in one subject and then run out of things to explore about it, I’ll stop being interested in it. But with art, you’re always learning something new and refining your skills and style. The day an artist stops learning is the day they stop growing and improving their craft.
I feel like it’s the same way with horses! Even after seven years of being around them nearly every day, I still learn new things about them, their care, and about riding. I absolutely love that! I’m always researching something new, learning something, and getting better at what I love.
2. Both are great forms of therapy.
Art has often been a form of therapy for me. When I’m feeling sad, or happy, or angry, I can channel that into a piece of art and work through those emotions. As long as I can remember, I’ve turned to art when I’m feeling bad.
Horses are also amazing therapy! There have been studies to prove it, but I don’t need a scientific study to tell me that horses have therapeutic properties. Horses make me laugh when I’m feeling down, they calm me when I have anxiety, and they are always there to listen when I need someone to talk to. Over the past few years I have cried into several furry necks when I just couldn’t handle things any more.
3. You can see the progress you’re making.
Looking back over the pieces I’ve created just in the past three years, it’s nice to see how my style and skills have evolved. As an artist, you evolve over time as you practice and hone your craft. I feel like the same is true when you ride horses (and even if you just care for them and do groundwork!)
When I first started being around horses, I was very timid around them. I had no idea what I was doing. I didn’t even know how to lead a horse, much less how to brush or tack up or care for one! Just a few years ago, I was too scared to canter my horse, who is notoriously difficult to get cantering because she rushes into it. But now I can canter around and around the arena until we both get tired, without fear of going too fast or losing control! Thinking about how far the two of us have come in the past years as a team is just crazy, and it gives me the confidence to keep on going forward and improving- in both my art and with my horse life!
In what way have horses taught you things about other areas of your life? Let me know in the comments!
Barn life is amazing, and sometimes you need to come up with a clever solution to a problem in a hurry! These are my favorite barn hacks to save time and money at the barn!
Keep a can of cooking spray in the barn. Spray it on the bottom of hooves in icy, snowy weather to keep them from getting packed with balls of ice.
Need a place to hang blankets to dry? Hook your cross ties together for a quick clothesline! Just be careful that you don’t run into them when you’re walking through the barn. (I’ve done this a time or two after I forget that I clipped them together!)
Cut an “X” in two tennis balls and put them on the ends of your cross ties so the snaps don’t “CLANG” when you drop them. If you have large clips, you may need some larger than standard tennis balls. We did this at our barn but the cross ties have really large clips and if the ties aren’t dropped just-so, they’ll still make a loud noise.
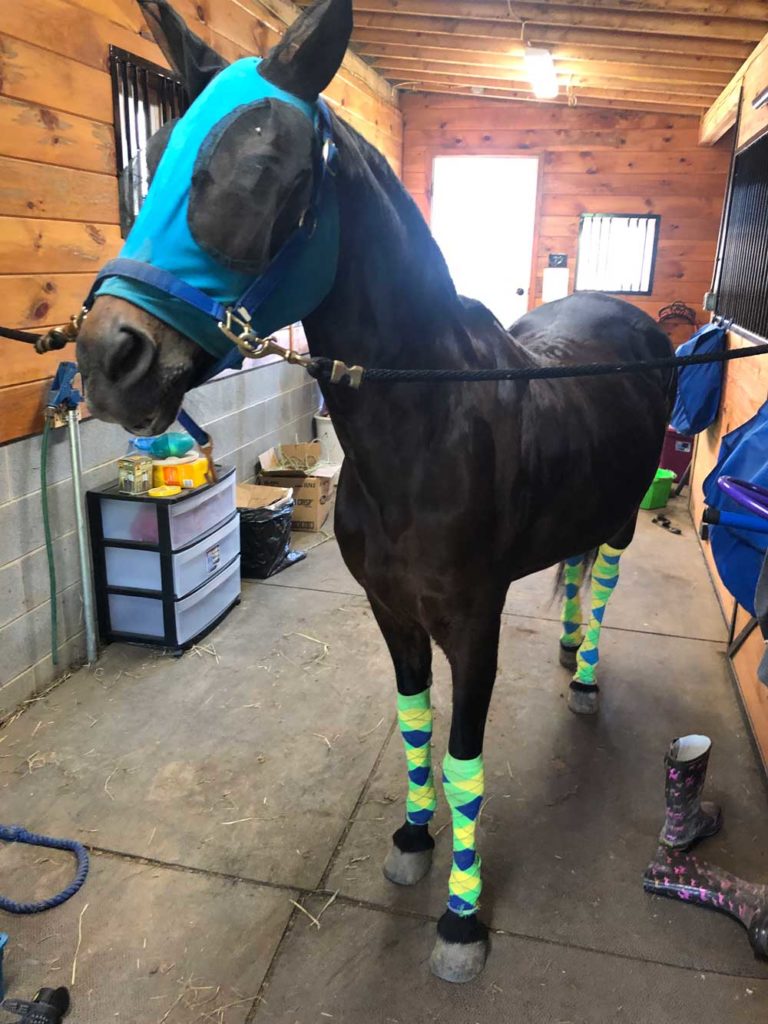
Tired of your horse stomping during fly season? Buy a pack of knee-high socks for humans, cut the feet off, and pull them over your horse’s feet to make DIY fly boots! If they come down too easily, get silicone caulk from the home improvement section of the store, turn the socks inside out, and put a few lines of silicone around the top to help them stay up better.
Glory wearing some DIY fly socks in crazy colors
Does the belly strap on your horse’s blanket keep coming undone? Wrap a braiding band or two around the post of the surcingle buckle to hold it tighter and keep the strap from coming free.
If your horse’s blankets have a small rip and you have basic sewing skills, you can repair it yourself! Use a heavy-duty needle and waxed thread (or dental floss) to stitch the tear closed. You can also get iron-on blanket repair patches. (Affiliate link)
Buy baby wipes from the dollar store and keep them in your grooming kit! They’re great for wiping your horse’s face off, or getting dirt off your own hands. Our horses always have crusty eyes, so we keep wipes on hand to get their faces nice and clean. (Also handy to have in your kit for a show- wipe your horse’s face off before going in the ring!)
If your pony has chestnuts or ergots that have gotten completely out of control, slather them in Vaseline to soften them up. After a bit, you should be able to pull them off by hand. Might take a few applications, depending on how big they’ve gotten!
Empty feed bags make great trash can liners. You already buy feed, no reason to buy trash bags too!
Keep menstrual pads and baby diapers in your first aid kit. They’re great for wrapping feet or for putting on wounds to soak up blood. Bonus: if you have a period and it starts unexpectedly at the barn, you have back-up supplies!
If you’re clipping your horse and need to make sure you have the cut even on both sides, measure using a piece of baling twine! Hold one end of the twine at the spine or crest of the neck and pull down to measure one side, then go to the other side and do the same to make sure you have the perfect clip.
Speaking of baling twine, if your knife has grown legs and wandered off, you can use a piece of baling twine to cut open a bale of hay! Slip the loose piece of twine under the twine that’s holding the bale, then grab both ends and pull them in a quick sawing motion, making sure to stay in one spot on the intact twine. Once you get good at it, this only takes a few seconds to cut through the twine!
Use the “flat” or “angle” setting on your hose nozzle to quickly rinse shampoo from your horse’s coat. Start at the top of their body and move down so that you use the water to “squeegee” the soap out of the hair.
Use pool noodles to cushion your wire saddle racks! Over time, a wire saddle rack can leave indents in your saddle’s panels. Cut pool noodles to size, then cut a slit in one side to the hole in the middle. Slip the piece of pool noodle over the wire rack so the saddle sits on the noodle instead of on the metal rack.
Speaking of pool noodles, they also make great boot trees! Cut to the length of your boot, then simply slip the pool noodle into your boots when they’re not being worn.
Getting rid of blankets that are too small or have too many rips to be repaired? Cut the buckles and snaps off them before trashing them! Now you have extra buckles and snaps for emergency blanket repairs or if you need them for elsewhere.
Those are just 16 of my favorite barn hacks. What hacks do you use around your barn to save time and/or money? Let me know in the comments!
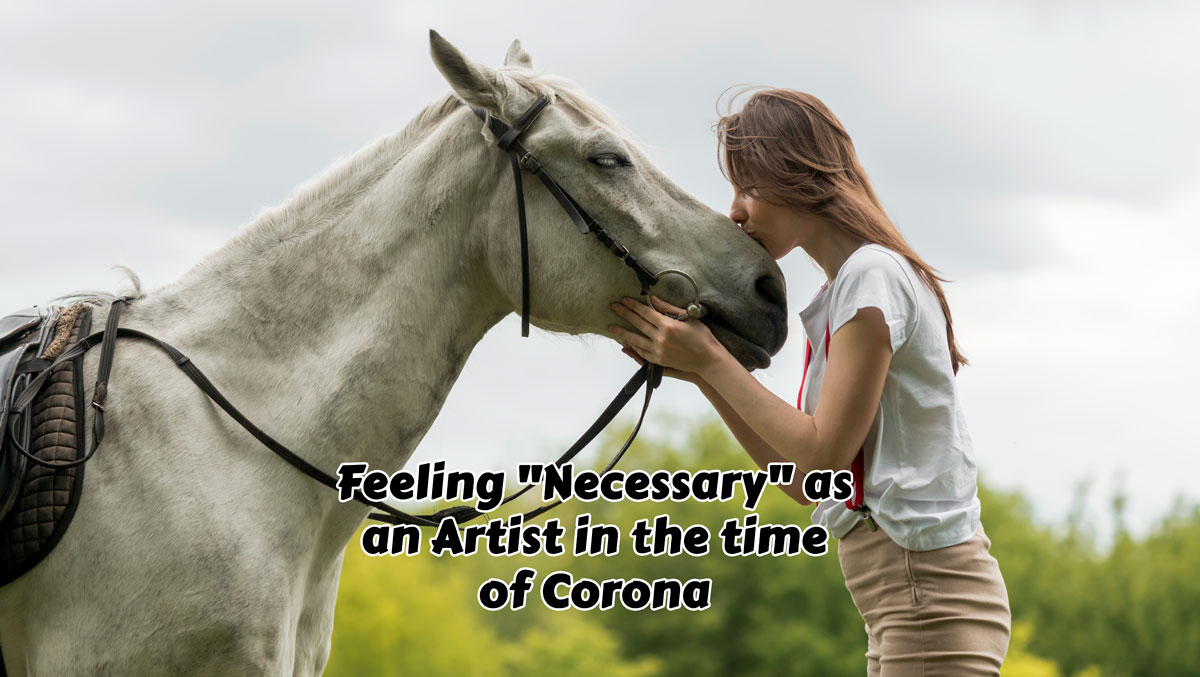
I’m trying to think of a way to start this post without saying, for the millionth time, that this year has just been crazy for the entire world. Australia was on fire in January, now the majority of the world is on lock-down and trying not to get sick and die, but in a lot of places people ARE dying and it’s horrible. It’s hard just being a human being right now, much less an artist who has depression and anxiety problems.
Many people would tell you that art is a luxury item and not a necessity. I think this pandemic has proven that art is much more necessary than lots of people would think. Not only are people streaming shows and movies, but I’ve also seen an amazing outpouring of artists offering free online painting classes, coloring pages, art lessons, and more. The local co-op I’m part of did a drop of free art supplies and they were snatched up in minutes. Even if you’re not creating art right now, you’re probably using the creations of artists to get through this time- whether those artists are movie directors, actors, costume designers, writers, musicians, game designers, illustrators, YouTube creators, or bloggers, you are most likely using the creations of at least one artist to get through this stressful time.
And even though I know all of that, it’s been very difficult to see what I do as beneficial to anyone at this time. I know I have some people who enjoy my creations, and even a few who read this blog, but it’s been so hard for me to feel like I should even be writing or drawing at this time. Part of that is stress and depression and too much bad news on social media. Part of that is just my brain telling me that there are more important things right now than horse drawings or YouTube videos or even blog articles about whatever I’ve got on my mind. I see my friends who are much more successful artists than I am also having a hard time right now and think to myself that if they’re struggling, of course nothing I’ll do will make any difference at all and I should just stop creating, stop writing, stop posting for a while.
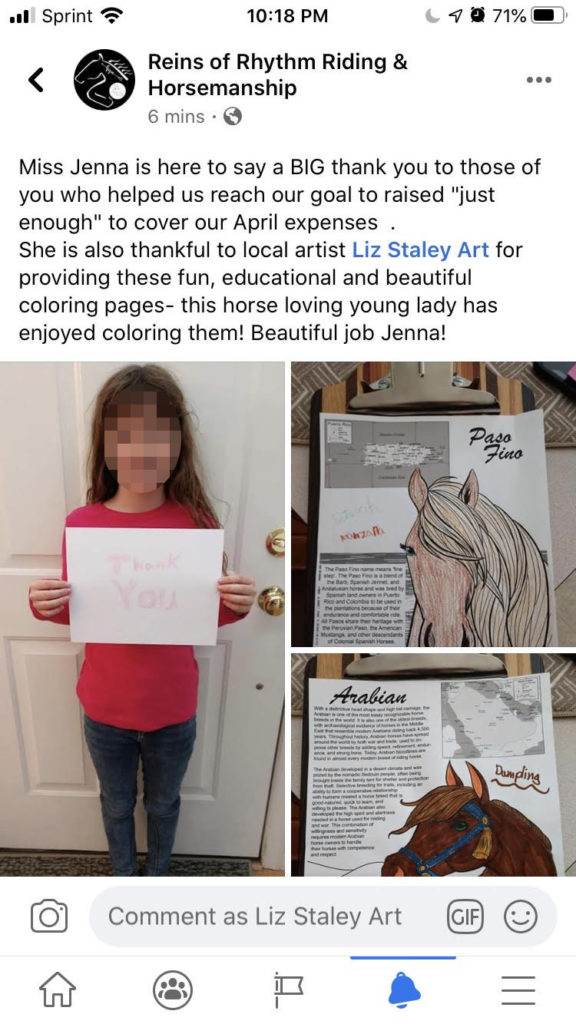
Then, a few days ago, a local therapeutic riding center I’ve had some dealings with posted this…
This post nearly made me cry, because I could see that SOMETHING I was doing was being enjoyed by at least one person. I released these coloring pages several weeks ago, and had no idea if they had even been looked at by anyone, much less printed and used.
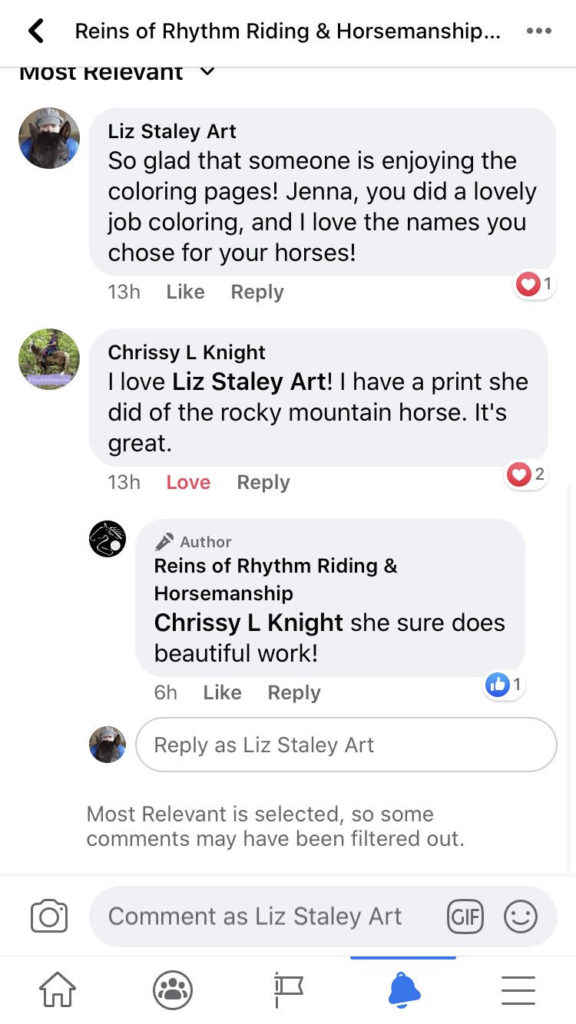
This comment was also made on the same post:
It’s amazing what a difference just a small thing can make. If you are enjoying the work of an artist during this time, please reach out and let them know if you feel comfortable doing so. It doesn’t have to be extravagant, and it doesn’t cost a cent. But it can make that artist smile and encourage them to keep doing what they’re doing.
What artists are you enjoying during this time? Let me know about them in the comments! (If it’s a music artist, let me know what songs you like! I’ll check them out!)
Sometimes making a video or a piece of art can take a while… in this case, it took me about 9 months to actually sit down and record this video. Last summer I ordered 6 items from Wish.com, all “free” items, to try making one of my horse artworks with. The video below shows the results!
But I hope that this video shows you can make art even if you don’t have the most expensive supplies! Where do you like buying your art supplies from? Let me know in the comments!
The “Six Fanarts” meme has been going around social media the past week or so, and most artists I know have been doing requests from their friends and followers from a variety of anime, movies, comics, and video games. I decided that I wanted to do 6 horse fan-arts! So here are 6 of my favorite fictional horses.
(Does Spartan count as fictional? I assume so, because the horse itself isn’t Spartan. Anyway, I love Heartland so Amy’s big black horse had to be included!) It was nice to just do something for fun, and to get some different styles in there too.
Being a small business owner, I love supporting small businesses! If they’re equestrian businesses, that’s even better. Here are some Equestrian businesses I’ve found that I think you might like too if you have similar tastes to me. Click on the photo to go to the seller’s shop!
(These are not affiliate links. I get nothing if you purchase from any of these businesses. I’m just trying to spread the love to others!)
I have literally canceled other plans because I wanted to ride instead. If that’s a crime, then I’m guilty!
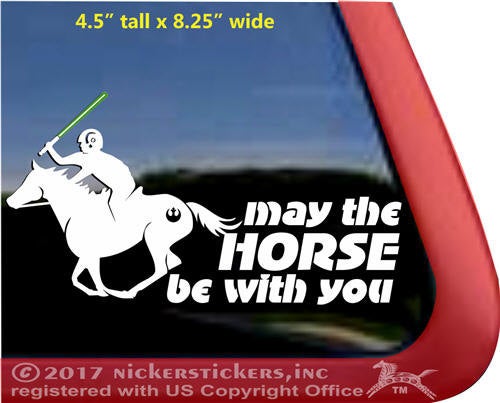
This shop has lots of great stickers, and I actually own the one in this photo. It’s probably my favorite decal ever, so I have no problem recommending it to others!
Absolutely beautiful art from Amy Lyn Bihrle!
Padded Ponies on Etsy makes some awesome and unique saddle pads. I love the superhero ones, but there are other great choices as well!
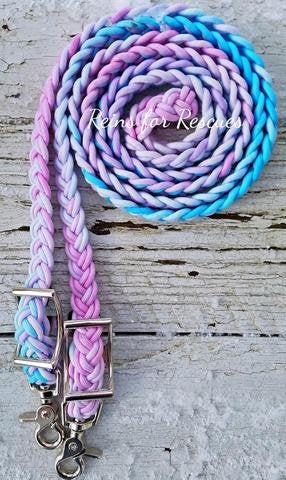
I’ve bought several things from Reins For Rescues and I love everything I’ve gotten from them. The reins in this photo wouldn’t go with the rest of my tack, but I love them anyway!
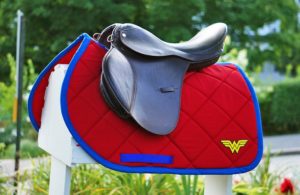
My best friend and I met the creator of Kin’s Customs two years ago at the Horse World Expo and I immediately purchased a Wonder Woman pad. It’s one of my favorite saddle pads that I own! The quality is amazing, and they always have fun designs and sets, like the above Dragon Rider set!
I’m not sure if Mare Goods “qualifies” as a small business, but I don’t think they’re as large as some others. And I adore their quirky sense of humor and style, so I’m including them here anyway.
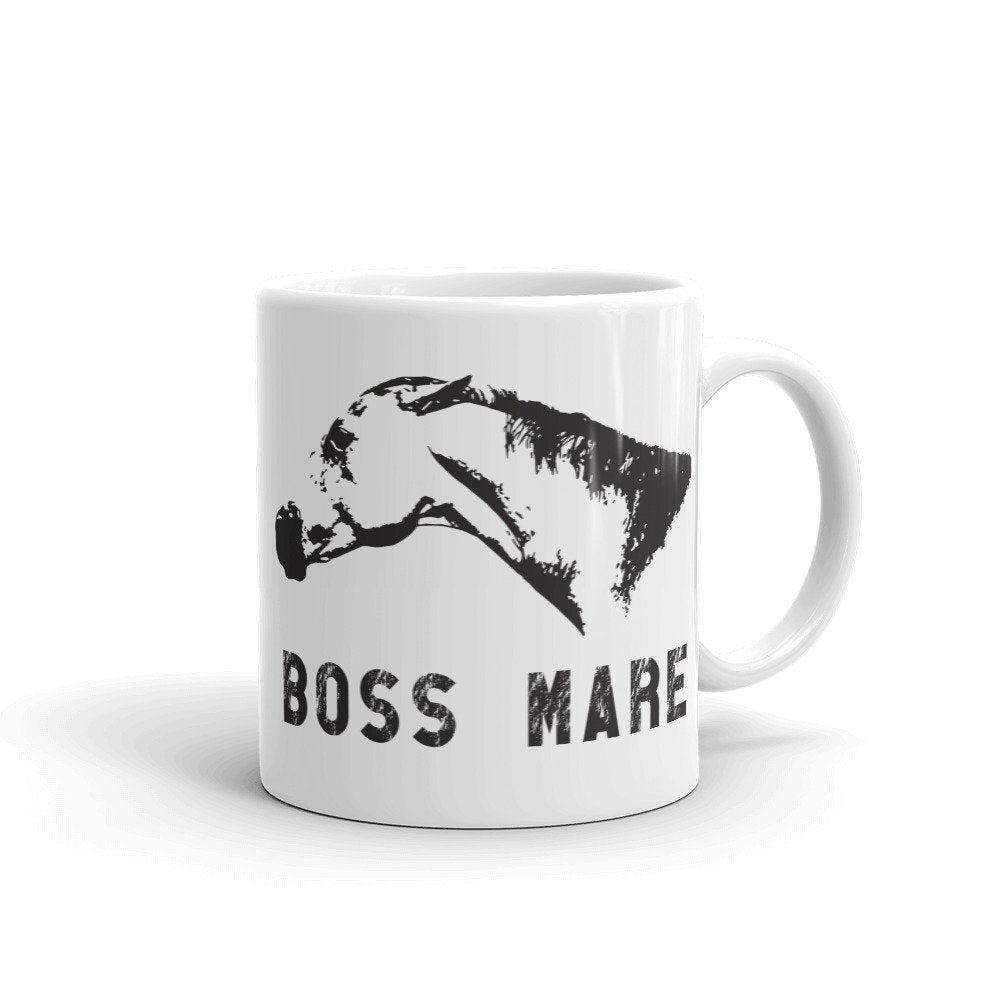
I absolutely NEED this mug by Equestrian Creations.
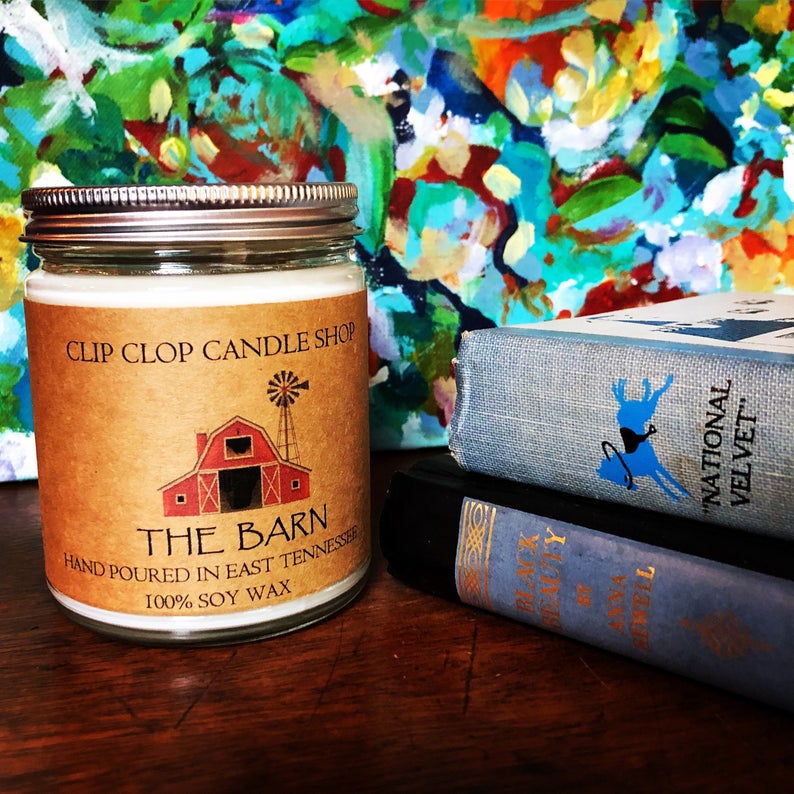
If you’re missing the smells of the barn, then this candle from Clip Clop Candle Shop is for you!
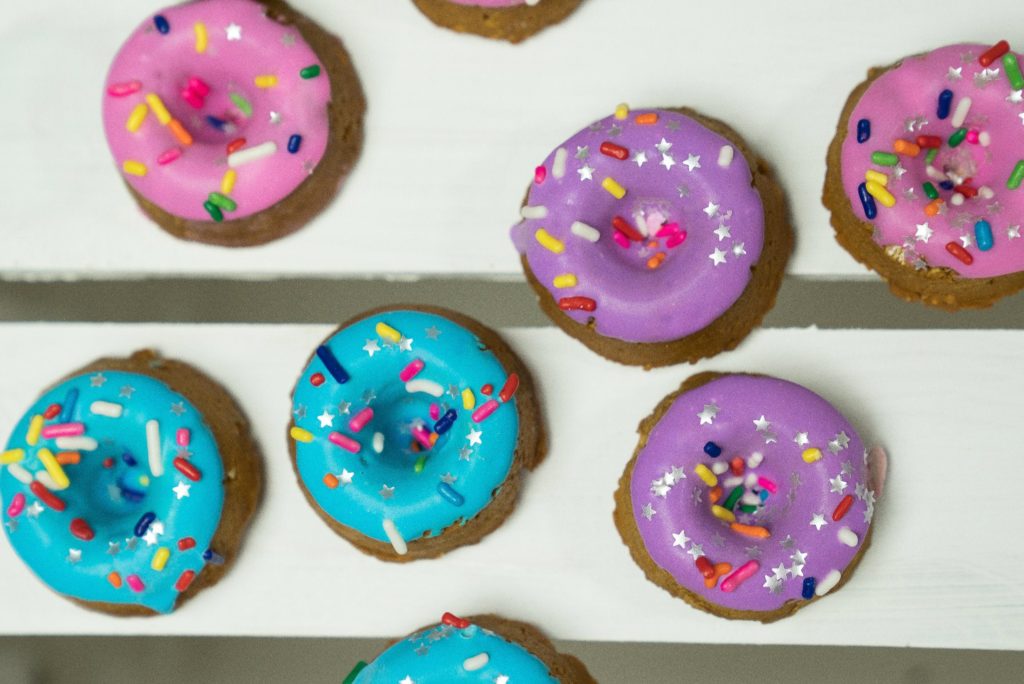
Shop The Posh Pony has handmade treats, socks, and more. Look at these adorable horse treats in the shape of donuts!
BONUS!
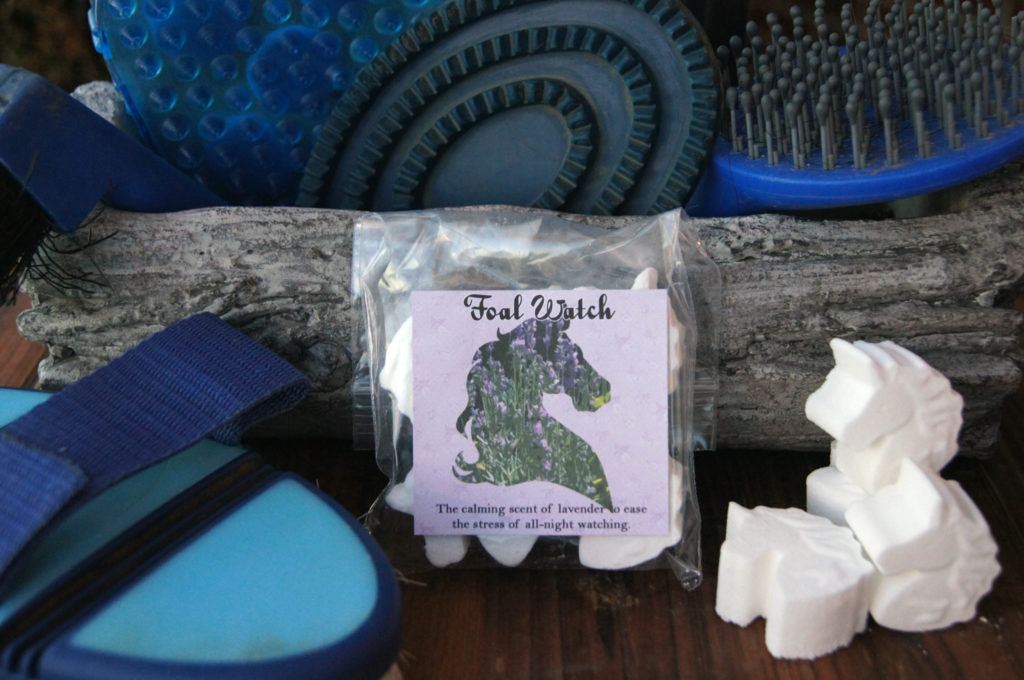
Okay, this one is a cheat… I’m a co-owner of this business! My best friend and I make these brush-cleaning fizzy bombs for your horse brushes. What better time than right now to get your brushes in tip-top condition and give them a good, deep cleaning? We have tons of different scents and use only natural ingredients to create our cleaners.
What’s your favorite equestrian small business! Let me know so that I can check them out too!
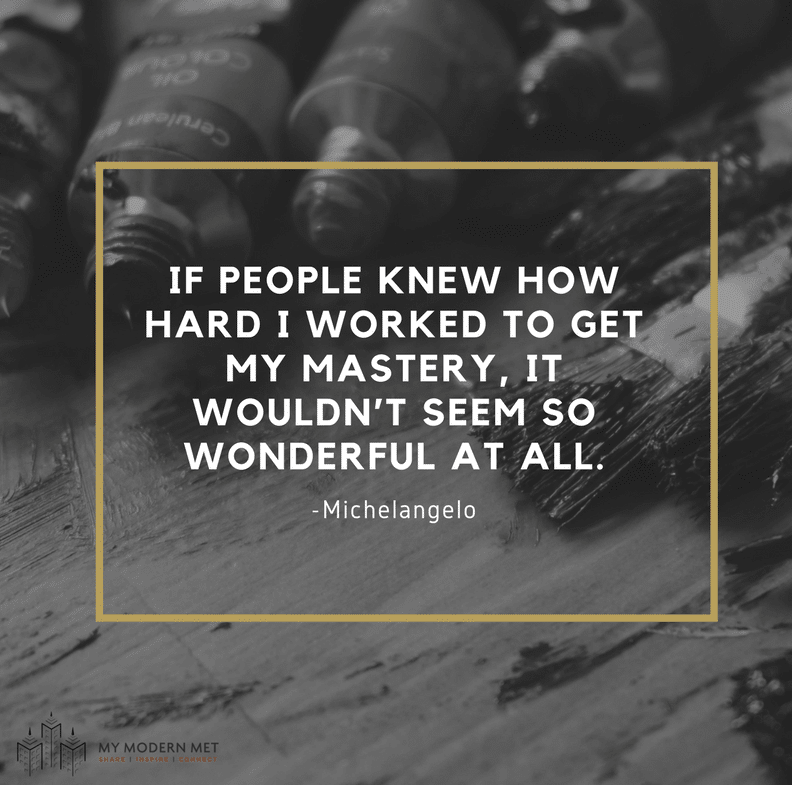
I used to have a fridge magnet my Aunt sent me that had a quote from Michelangelo on it. The quote said “I am still learning.” I remember being shocked at it when I received it, because certainly Michelangelo, one of the greatest artists in history, knew everything about art! But as I’ve gotten older, I’ve realized that an artist should always be learning. So here are five tips I’ve used to improve my horse illustrations.
These things have worked for me, and they might help you too. But every artist is different, so your mileage may vary. I’d love if you shared your own art improvement tips with me in the comments, as well! But for now, let’s get to the list…
Don’t Be Afraid to Use Reference!
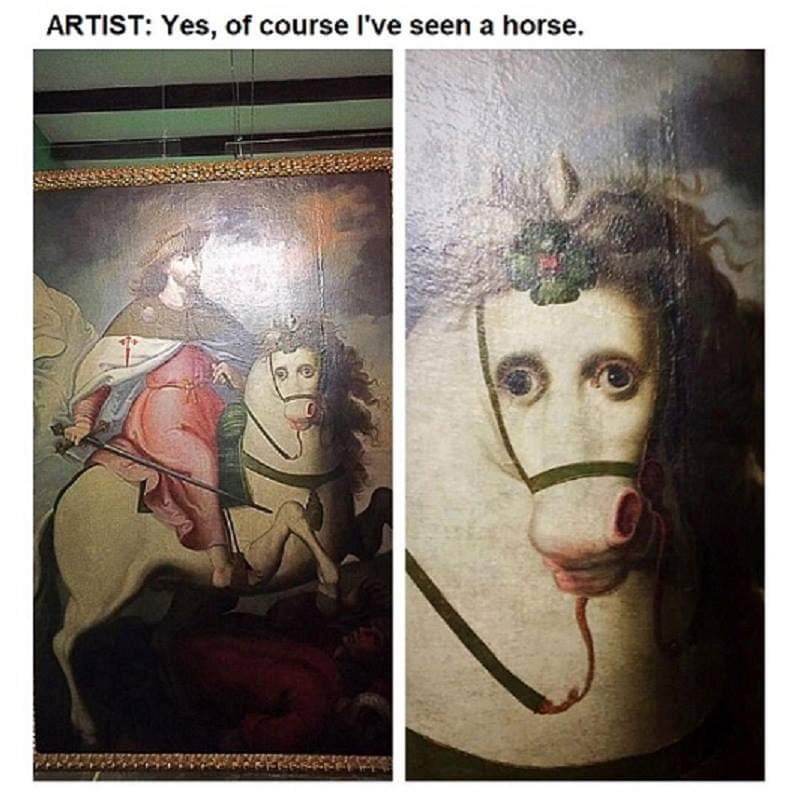
This probably seems like a no-brainer, but you’d be surprised. There seems to be a stigma, for some reason, AGAINST using reference when you’re an artist. I’ve heard people say that it’s cheating, that you’re not a real artist if you use a reference, and that using a reference is no better than tracing! This is wrong, wrong, WRONG. Artists have been using reference since time immemorial, and you SHOULD be using reference if you want to draw things that exist in the real world. (And sometimes for things that don’t exist, but that’s a different blog article for a different time.)
How in the world can you draw something if you don’t know what it looks like? That’s how you get those hilarious Medieval paintings where the horses look like they have a human face!
Via Reddit, original source unknown
Now, there is a big difference between tracing and using reference. Tracing can have some benefits to improving drawing, like building muscle memory of forms and shapes. But drawing from reference without tracing is the best way to go. Take your own reference photos when possible, because photographs that you find on-line are copyrighted unless otherwise specified.
Look at the Negative Space.
Many artists look only at the form that they are drawing. However, as an artist, you need to learn to see the other spaces and angles, not just the form that you’re drawing. When you look at your reference image, look at the spaces between and around the forms (called the negative space), and see if they match. I often find myself using landmarks when drawing, such as saying internally to myself “The hoof of this leg is at the same height as the knee of the opposite leg, and the knee of this back leg is equal to this curve here.” It’s like building a road map in my head, looking at the space between the forms, the angles that they make, and the ways that different parts of the object match up.
Often we draw what we THINK something looks like, instead of drawing what something actually looks like. Our brains have a library of symbols that it substitutes in sometimes, kind of like a child’s drawing of an eye. A child’s drawing of an eye is a “symbol” of an eye and not a wholly accurate representation. Looking around the outside of the subject of the drawing can help improve the form by letting you see how accurate the drawing is.
(For more information on how to see the world as an artist, I recommend Drawing On the Right Side of the Brain, it really helped me out back in my high school years!)
The negative space can be just as important as the subject itself.
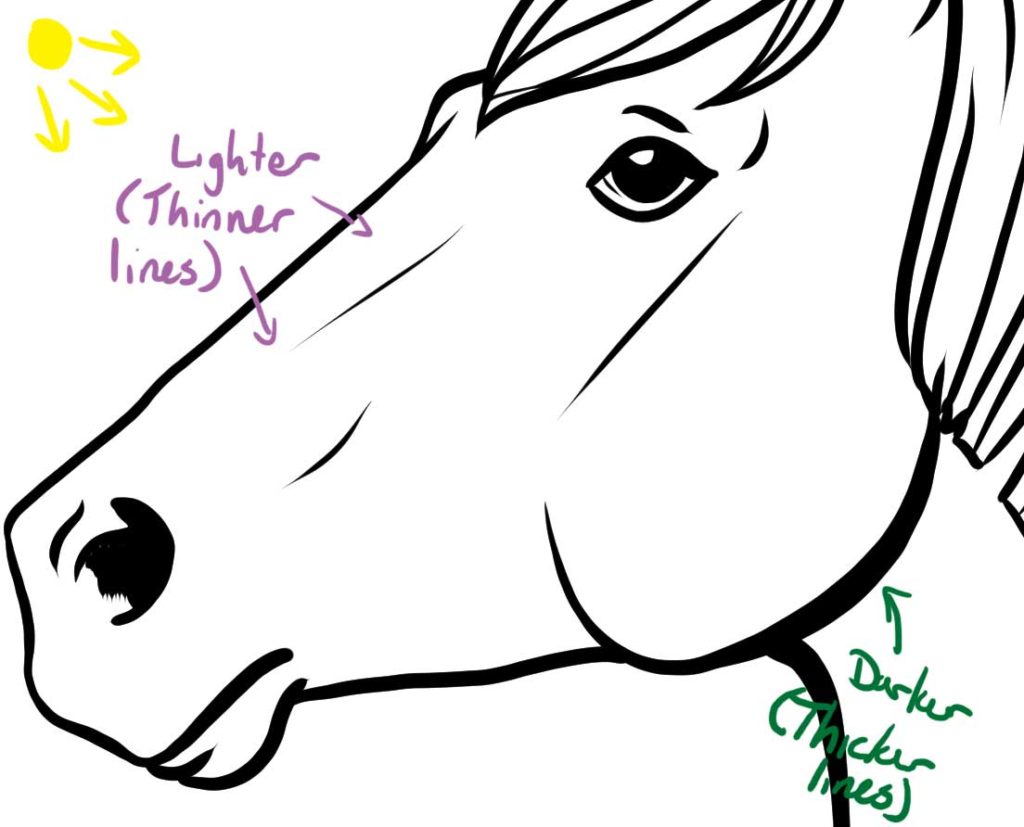
Consider Line Weight.
Okay, so your mileage may vary on this one depending on your art style. If you draw hyper-realistic and don’t use harsh lines in your images, then it probably doesn’t apply. But for those who do, make sure that you consider line weight in your drawing!
What is line weight? Having varied line weight means that the lines in your illustration aren’t all the same width. The general “rule” is that you should decide where the light source is in the drawing first. Then lines that are closer to the light source should be thinner than the lines that are in the shadows/farther away from the light source. In the example below, the lines closer to the top-left light source are thinner than the line under the horse’s cheek, where the shadow would be. Using a variety of line weights can add depth and dynamism to your drawing, and rhythm can be created with the changing thickness of the lines.
Example of line weight.
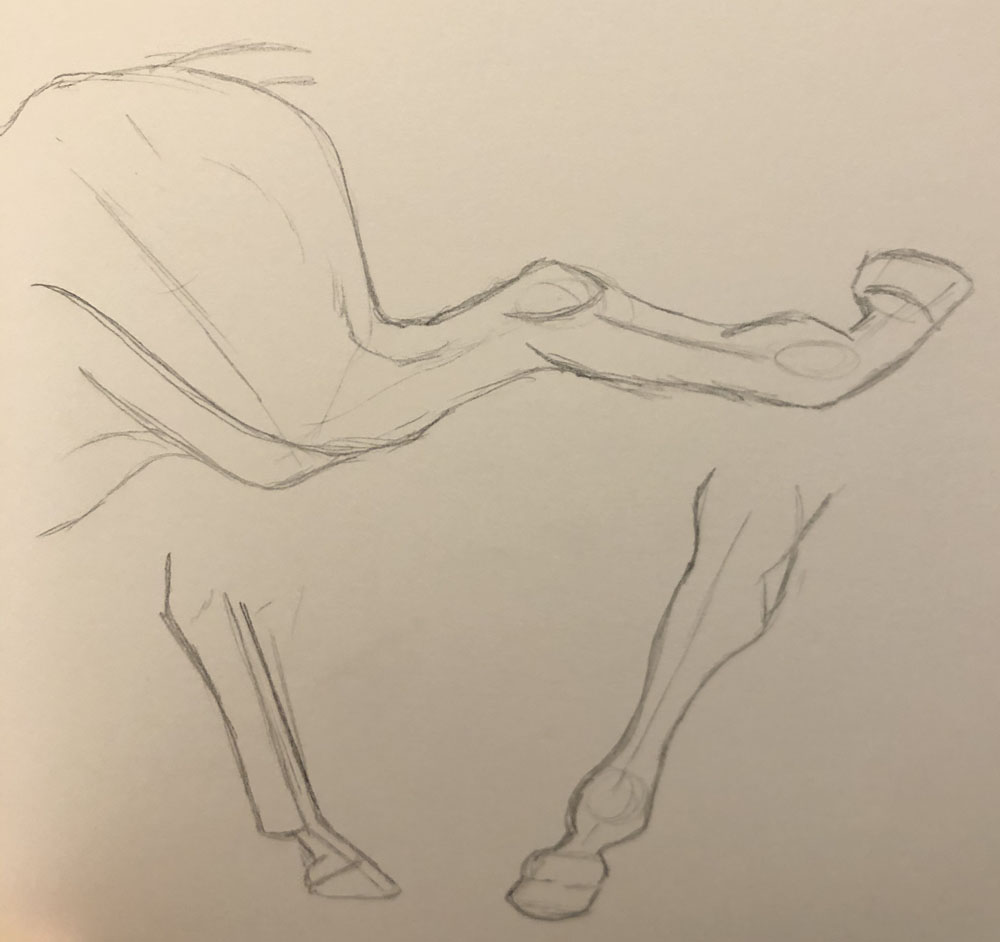
Concentrate on Areas You Struggle With.
Have trouble drawing hooves? Look up reference photos of hooves and draw 50 of them. Have trouble drawing legs? Draw 100 legs. Having trouble drawing horse heads in any pose but a straight-on profile? You guessed it- go get reference and draw what you’re having trouble with. Draw it over and over and over again- just loose sketches are good, you don’t need to have each sketch be a masterpiece.
Back when I was drawing cartoons and comics, I had trouble drawing human hands (who doesn’t, though, right?). So I would draw hands over and over and over again until I improved. If you’ve having trouble drawing something specific and you want to get better at it, don’t avoid drawing that thing! Instead, open up your sketchbook and do rapid-fire sketches of that subject until you get better.
Leg and hoof practice, from my travel sketchbook.
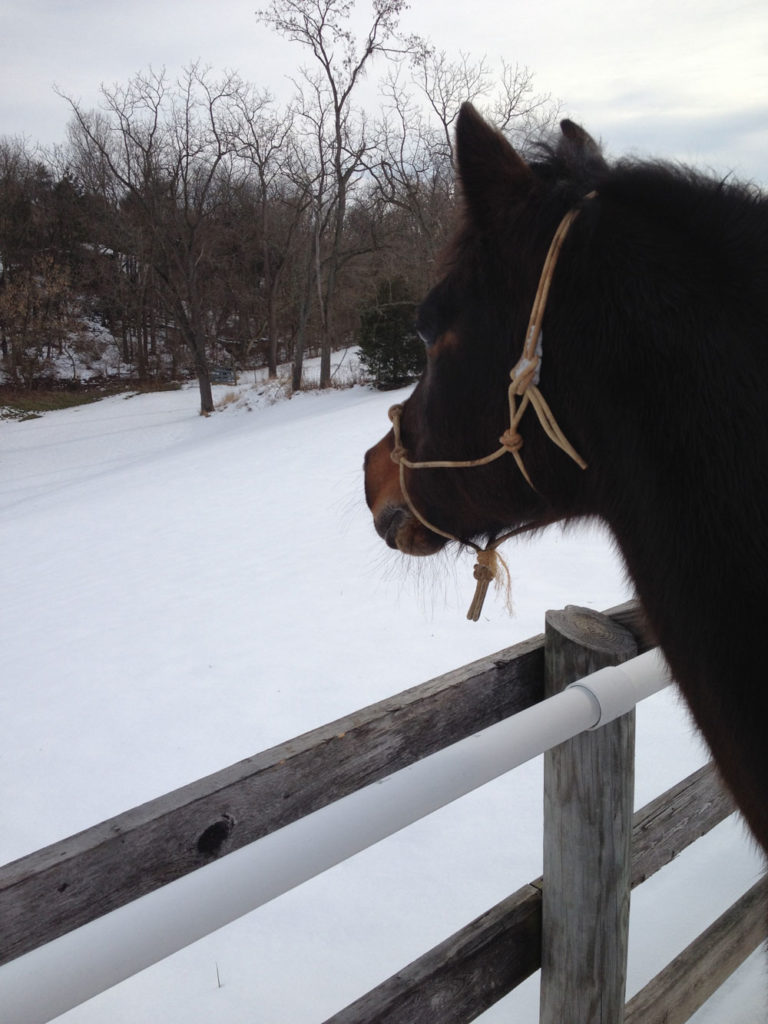
Observe Real Horses.
My final tip for improving your horse drawing (or any drawing) is to observe your subject as much as possible. Even when I’m just out brushing my horse, or standing in the paddock or stall with her, I’m usually trying to observe. I did the same thing when I worked at different barns because it gave me an opportunity to observe many different breeds of horses. Watching the real thing can allow you to get a feel for what the subject looks like in three dimensions, which can help when you go to render that subject in two dimensions! It seems like common sense, but I found that with my own art journey this wasn’t something that I’d ever been told or had really figured out until recently.
So if you can get out and observe the real thing- even if you can’t get out and draw from life- really looking with intent and observing your art subject can help improve your skills.
Always observing…. Also, reference photo!
I hope these tips have given you some idea of things you can try to improve your drawing, whether you’re making art of horses or anything else! What things do you do to improve your art skills? Let me know in the comments! I’m always looking for new tips and techniques!
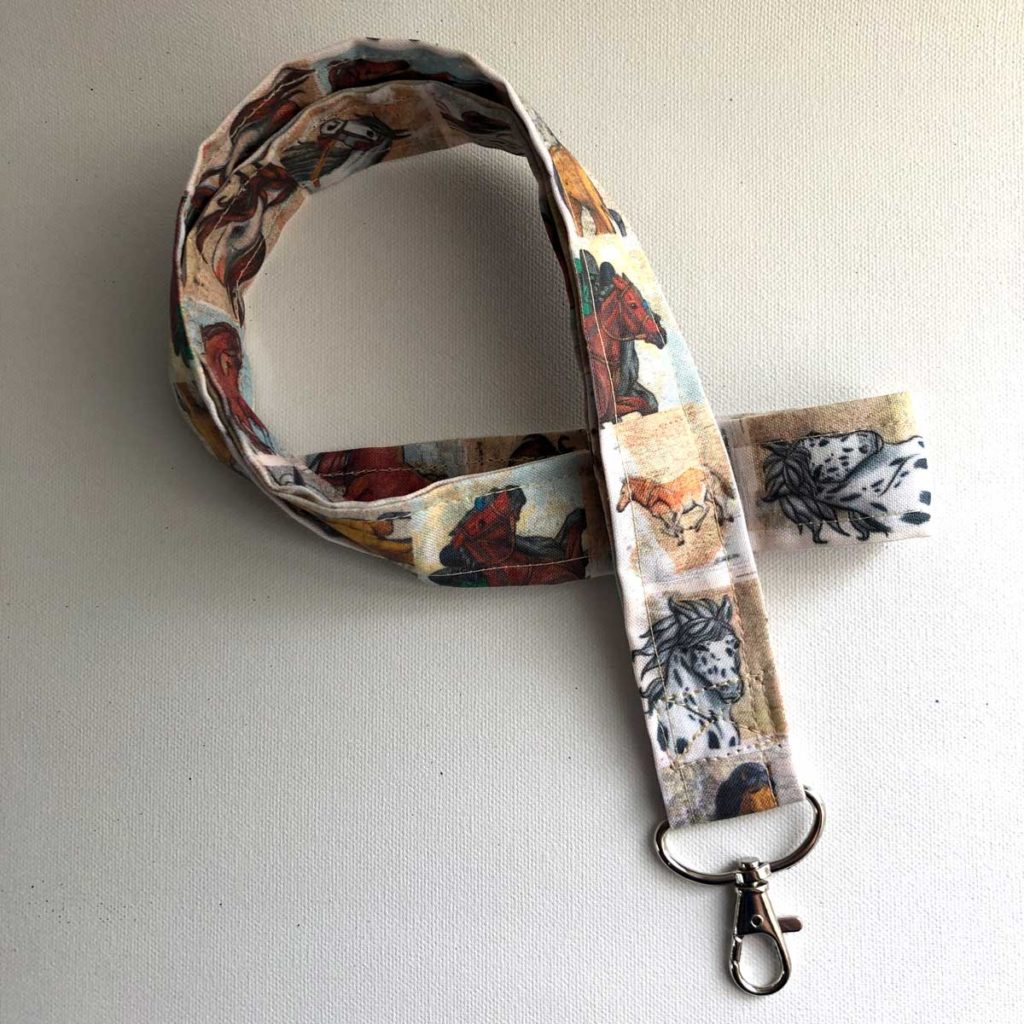
It only took three days, three broken sewing machine needles, a broken desk, and a few tears, but finally I have some key lanyards made! I’ve been making key fobs since late last year, but wanted to offer proper lanyards as well. So I finally sat down and found the hardware I’d need (the fabric is just a tiny bit wider than normal lanyards so finding the hooks took some searching), ordered more fabric, and whipped a few of these up. I thought these were going to be a lot easier than they ended up being, but once I got the technique down they started getting easier.
I really love how these turned out, despite that getting the first one done caused so much grief!
It’s only Monday, but I’m feeling a bit more optimistic this week than I have been. Maybe it’s just because it’s a new week, or maybe it’s because I got up early today and took a 30 minute walk before my day got started. Don’t know, don’t care. It’s just nice to have some energy today!
How are you feeling today? Do you have any plans for creative things this week? Let me know!
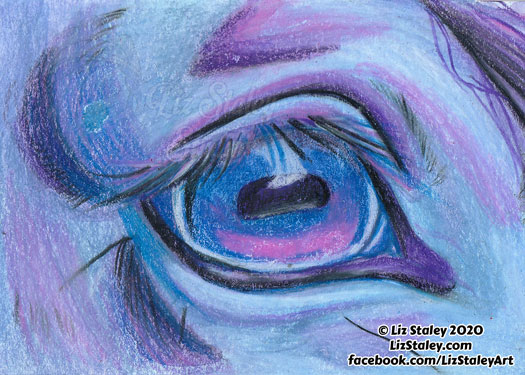
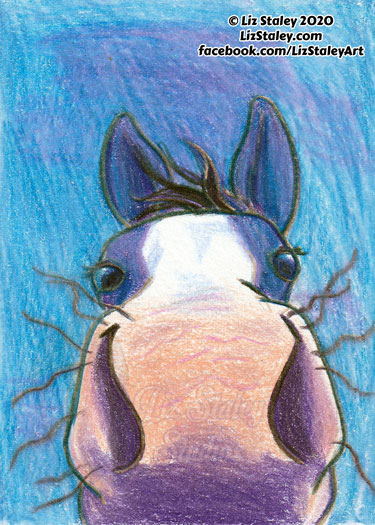
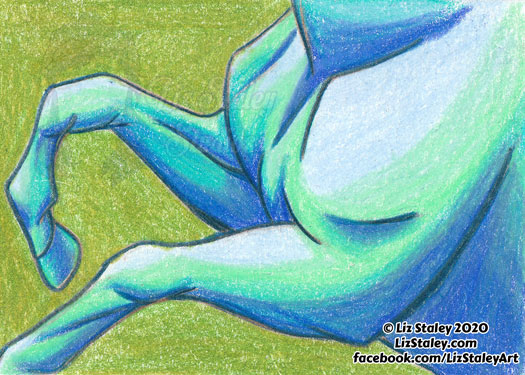
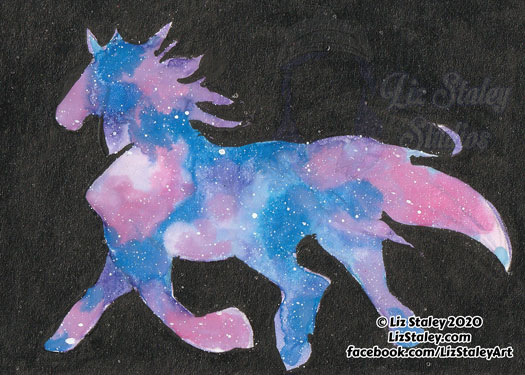
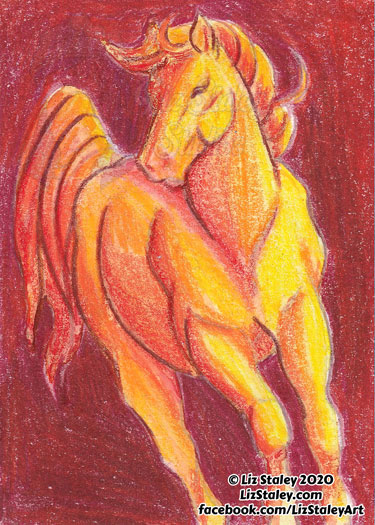
I learned about art cards back in my beginning days of having an Etsy store and was immediately struck with interest in this art of making small pieces. But what are art cards?
Art cards, also called ATC (Artist Trading Cards) or ACEO (Art Cards, Editions and Originals) were created in 1997 by a Swiss artist named M. Vanci Stirnemann. He created 1200 cards by hand as part of an exhibit, then at the end invited others to create their own cards to trade with him during the closing reception. The movement took off, and now card swaps take place in cities and on-line. The only “rule” of art cards is that their size of 2.5 x 3.5 inches.
(Well, okay, technically there is another rule. ATCs are only allowed to be traded, but ACEOs can be bought and sold for money, but that’s neither here nor there.)
I absolutely love making art cards. They are a little frustrating, as well, because of their small size. Drawing so small is a bit of a challenge for me, especially when trying to draw something like a horse. But it also gets the creativity flowing and can allow me to think of new and interesting compositions, like close-ups or framing the subject differently.
Since I’ve been feeling pretty down lately, doing a large piece just feels so daunting. So I started doing some art cards instead. I’m finding them very therapeutic to work on. They’re a “bite-sized” project that doesn’t require a ton of time commitment, but that I can do some really fun and new things with. They’re also perfect to experiment with new mediums on, as well, because they’re so small. Some of the ones in this blog post I tried out some watercolor on even.
So, if you’re looking for a small project to have some fun with, try making some art cards! You can use anything for the base, so long as it’s 3.5 x 2.5 inches. Try paper, cardboard, cardstock, small pieces of canvas, or anything else you have around. You can use fabric, collage, paint, colored pencils, markers, or anything else to make your design.
These have been a lot of fun for me to work on, and I hope you enjoyed learning about art cards!
What art do you turn to when you can’t mentally handle your normal routine? Have you heard of art cards before?
This week’s video is the creation of Chamomile! I love some Chamomile tea when I’m feeling stressed, so the inclusion of this herb in the Medicinal series was a no-brainer.