Posted on Leave a comment

How to Keep Horses On a Budget

Let’s be real for a minute: having almost any type of pet can get expensive. But make that pet several hundred pounds and the costs just go up exponentially. Anything with the word “horse” in the title or a picture of a horse on it can cost more than double the same item that isn’t marketed to horse owners. I don’t make a lot of money, but have still managed to find ways to have a horse and enjoy her without spending tons of cash. It takes some planning and careful shopping, but it can be done! Here are some tips to cut your horse expenses.

Disclaimer: Check with a veterinarian or a trusted professional before making choices about horse feed, supplements, or other nutritional needs for your horse. Each horse is different, with different needs and workloads. The following is general advice and not meant to diagnose any specific need for your personal horse!

Get a PPE before buying your horse.

If you don’t have a horse yet and are looking to buy one, make sure that you get a vet out to do a pre-purchase exam on any horse you are seriously considering. I don’t care how much you love that big, young Chestnut gelding at the rescue, without a PPE you may take him home and find out two years later that he has a terrible case of kissing spine because you didn’t get x-rays and a vet exam before adopting! If you already have a trainer you trust, take them with you horse shopping to get a second opinion. If you don’t have a trainer, find one with a good reputation and get their opinion before buying. It may seem silly to spend money on a vet exam for a horse you may not buy, but it could save you lots of grief and expense in the long run by catching potential problems before you’re the one responsible for thousands and thousands of dollars in vet care.

Self-care board or exchange board for chores or other goods.

Keeping a horse at home is the cheapest and easiest option for owning one, but sometimes having a horse in your backyard just isn’t possible. When searching for a boarding barn, see if you can do self-care (if allowed!) for a discount or if you can help out with barn chores or by trading some other service or goods for some of your board price. (For instance, if you’re handy with tools you can offer to repair fences or do other tasks around the facility!) Self-care only makes sense if you can afford the gas and time to come out every day, possibly multiple times a day, so be sure to figure that into your planning before committing to it. My best friend and I currently self-care at her parents’ farm, and we take turns coming out to feed the horses and change blankets so that all the running around isn’t just on one of us.

Feed the best quality forage you can afford.

Barring medical issues such as Cushing’s, most horses will do just fine on a steady diet of quality grass. Hay is cheapest in the summer when grass is plentiful, so buy as much hay as you can store during the growing season. Buy the best quality hay you can afford, and feed from hay nets or feeders that are up off the floor to minimize wastage. Just remember that horses are designed to eat from the ground, so try not to feed their hay TOO high. And if using hay nets, hang them high enough off the ground so that your horse won’t get a foot stuck in it! 

Don’t overfeed grain and concentrates.

Horses are designed to forage most of the day, not eat big meals all at once. If you are going to supplement with a feed, make sure that it’s appropriate for your horse’s needs and that you aren’t overfeeding grain and skimping on hay. Feed, supplements, and concentrates can add up quickly, so unless your horse needs “extras”, feed more hay than grains. Never feed horses any food that is for cattle, as it can contain ingredients that are dangerous to horses!
Check tack regularly for wear and tear.

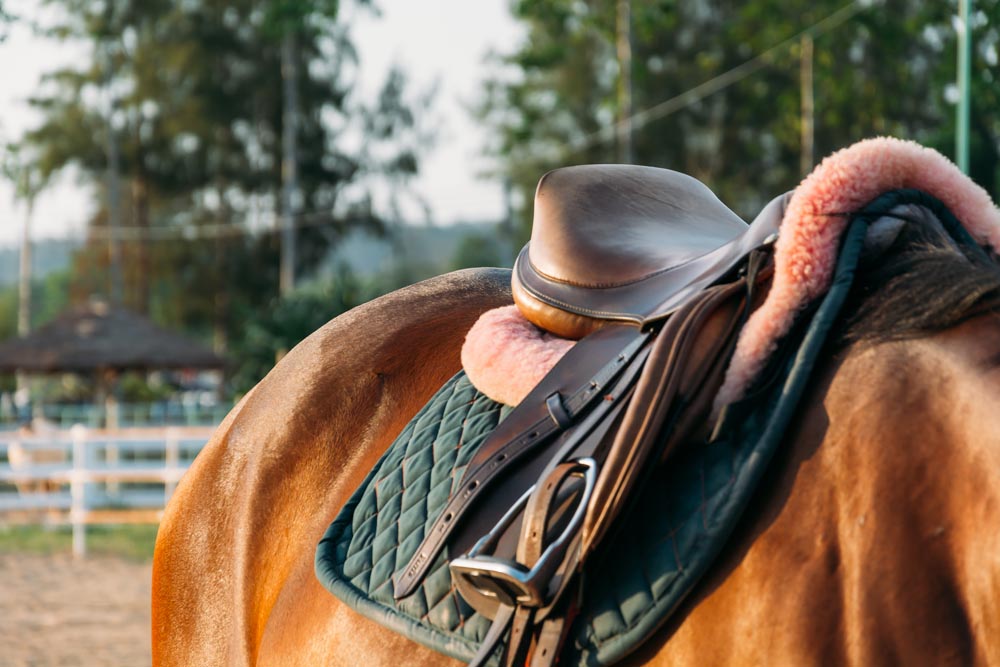
Buy tack secondhand, perform regular maintenance on tack you already own.

Thanks to the internet, it’s becoming easier and easier to find horse tack second-hand. There are groups with thousands of members that are dedicated just to buying and selling used tack, from Western to English, and even Driving tack! If you need a piece of tack, look for it used first before buying new. Not only is it better for your pocketbook, but it’s also better for the environment, too! Also, most tack stores have a consignment section where you can purchase gently used items from other local horsepeople. 

Once you have your tack, be sure to perform regular maintenance on it. Clean your tack regularly to check for signs of wear, leather fatigue, or metal fatigue. Check saddle billets, girths, and bridles for wear. It will be cheaper to keep your tack in good shape with regular cleaning and conditioning than it will be to keep buying new tack. Also, keeping up with tack maintenance will help prevent sudden tack failures that could lead to vet or hospital bills.

Have your horse go barefoot.

If your horse doesn’t NEED shoes, he probably shouldn’t be wearing shoes. Obviously your circumstances will vary, but it will be much cheaper to just pay for a trim whenever the farrier comes out than having to pay for shoes. As a bonus, the horse can’t pull a shoe if they don’t have one on, so you won’t have to pay the farrier to come back out after you find the left hind shoe out in the muddy paddock two days after it was put on!

Clean and repair your own blankets.

Or, don’t blanket your horse at all if they don’t need it. Most horses don’t need a blanket at all unless they are clipped, old, underweight, or don’t grow a good winter coat. So you can save a bundle just not blanketing your horse at all! 

But, if you do blanket your horse, you can clean and repair blankets on your own! There is a commercial blanket wash you can purchase that you use in the washing machine. Taking your blankets to the local laundromat will likely be cheaper than having them washed by a professional blanket person in your local area. Just be sure to use only recommended cleaning agents so you don’t damage waterproofing on your blankets, or treat them with a waterproofing spray after they’ve been cleaned.

You can also repair rips and tears either with iron-on patches specifically designed for horse blankets, with patches meant for tents, or by sewing the rips by hand. We’ve sewn up several rain sheets because Raven is tough on Glory’s blankets and like to rip them up, and have even re-attached broken straps on a bellyband of a winter blanket just by sewing it back on with a heavy-duty curved needle and waxed thread.

If your horse blanket does get a rip and you purchased it recently, contact the store you purchased it from or the manufacturer and see if the damage is covered under any sort of warranty. The previously mentioned winter-blanket-with-the-broken-bellyband was brand new and was still covered under the warranty, so we got a refund for the cost of the blanket and bought a new rain sheet (bonus: we got to keep the winter blanket, so after we repaired it we’d gotten two blankets for the price of one!)

Those are some of my tips for keeping horses on a budget. For more ideas, be sure to check out one of my favorite YouTube channels, The Budget Equestrian

Do you have any money-saving tips for taking care of your horse? Share them in the comments!

Have you seen my merch on Amazon yet?

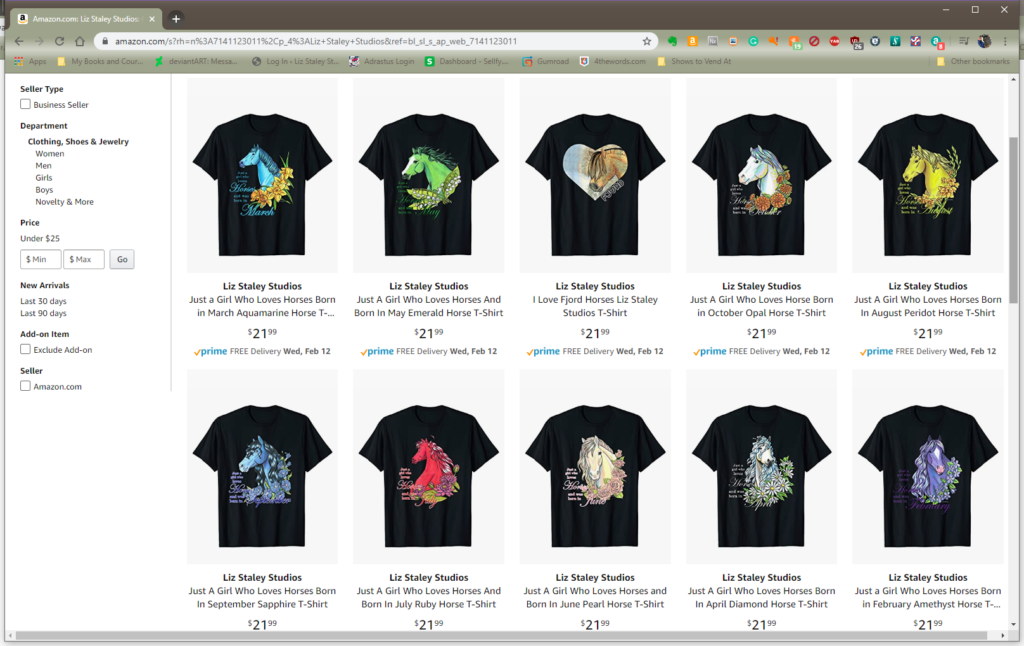
Birthstone horse shirts are available on Amazon! You can get February-October’s designs on a variety of fits and colors, while taking advantage of your Amazon Prime benefits! I got to see one of these shirts in person just yesterday and I am BLOWN AWAY by the quality. The print looks amazing and the shirt itself is high-quality. Definitely recommend getting a shirt for yourself or someone you know who loves horses through my Amazon shop if you want the best feeling shirt ever!

I will be adding more shirts to Amazon as I can, however the way that this program works is different from other t-shirt storefronts I have. With Amazon, you have only so many design “slots”, and as you sell more shirts you rank up and get more slots. I am currently on the lowest level and only have 10 design slots, so I can’t put up all the months until I open up more slots. This means I have to get more people to buy shirts on Amazon! So if you know someone who would love one of these designs, please share the link with them! I need to sell 7 more shirts before I can get to the next tier, so there’s still a ways to go but I know we can do it.
 

Featured photo created by katemangostar – www.freepik.com
Horse with saddle photo created by topntp26 – www.freepik.com

Posted on Leave a comment

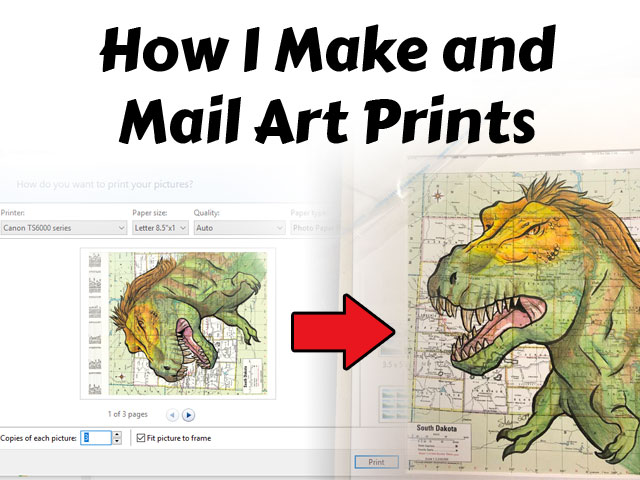
How I Make and Mail Art Prints

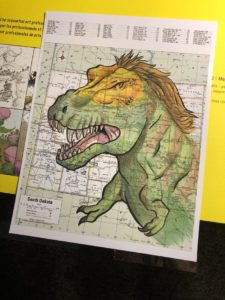
Prints are an affordable way to collect art that you love. They are generally much cheaper than originals, depending on the printing method, and are usually more accessible than buying originals because there can be as many copies as the artist likes of that piece! Below is the step-by-step process that I use to take an original piece of art and turn it into a high-quality print, and how I safely mail that print to my customers. I like making my prints at home because I can carefully control the look of my prints and make sure that each one is as close to the quality of the original drawing as it can possibly be.

Making the print

Once I have my piece of art complete, I either scan or photograph it so that I can get it into my computer to make prints. For scanning, I use the scan feature on my Canon TS6020 to wirelessly send my image to my desktop. The most important thing to remember when scanning your image is to set the scanner to at least 300dpi so you’ll get a good print from the digital image. 

I use the photo setting on my scanner and set the quality to 600dpi, then send the image to my computer. 

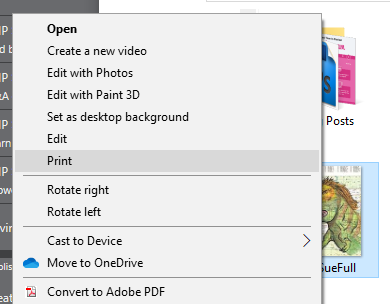
Once my artwork is digitized, it’s time to make a print! Most of the time, I do this through the Print function in Windows 10. I simply open the folder where my image is saved, select the image that I want to print, right-click the file, and select Print.

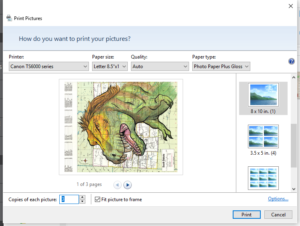
Windows brings up a printing window with several options that usually suit my needs for simple printing. For the print that I’m creating in this example, I’ve selected an 8×10. Windows will automatically resize or crop the image so that it fits in those dimensions. 

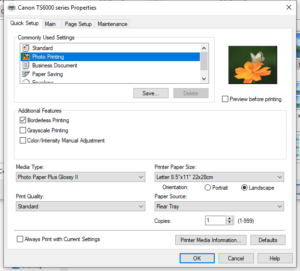
I use a glossy, 230gsm photo paper to print my art on. The Canon TS6020 has a rear paper tray that I use both for photo printing and for printing labels, so I make sure I have my photo paper in the tray. Then in the printer properties, I set the quality to Photo Printing and make sure that the art will print on the paper in the rear tray. Make sure to change your settings to glossy paper for the best results, or your print may turn out streaky!

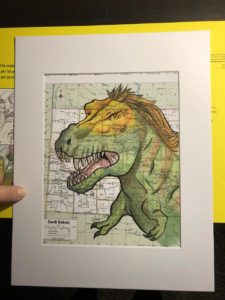
Now that my printer is done, it’s time to mat the print. All my 8×10 reproductions come matted so that they are ready to put into any commercially available 11×14 frame. I used to hate the matting process, but I’ve discovered a trick that makes it a lot less harrowing! I purchase mats for prints in bulk.

To start, I place the print on my desk or a table, with the bottom edge hanging off the table. (You’ll notice that I didn’t trim my paper down to 8×10 after printing. I do this so that I have more “wiggle room” with the matting, but you can trim your print down if you’d like) Then, I place one piece of tape on each corner, with the sticky side of the tape facing UP. It is very important to make sure that your tape is on the backside of your print and that the sticky side is up, or the mat won’t stick to the tape!

Next, take the mat and carefully put it over your art. I don’t put the mat all the way down just yet so that I can be sure it’s as straight as possible, and that there’s no white from the untrimmed paper showing around the edges. I also make sure that I place the mat so that my artist signature is still visible and not cut off. Once the mat is where you want it, set it down and reach under the mat and print to press the tape up onto the underside of the mat.

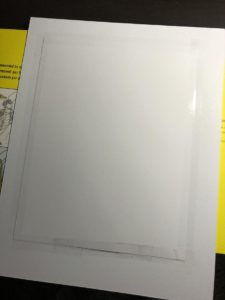
Now that the bottom bits of the print are stuck to the mat, I turn the print and mat over to the backside and put tape around the edges to hold the picture to the back of the mat. And now we just need to put a backing board behind the matted print and put the whole thing in a bag!

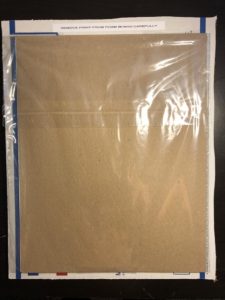
My chipboard backs and print bags are made of 100% recycled and sustainably produced materials. I have been trying to reduce my plastic waste over the past few years and using regular print bags made me feel guilty, but I don’t like sending out my work without some protection around it! So when I found these bags from EcoEnclose, I knew I had to have them. They cost a good bit more than the print bags I used to use, but I think it’s worth it to use recycled and sustainable materials. 

Mailing the Print

Now that our print is matted, boarded, and bagged, it’s time to ship it out to another happy customer! My most important consideration when mailing a print is having it get to its destination without getting banged up, ripped, or dented.

To start, I take the bagged print and put it face down on a piece of foam board or cardboard. I’m using cardboard in the photo because I ran out of foam board (will have to go pick some up!), but I prefer the thickness of the foam board to regular cardboard. Next, I put a few pieces of tape on the edges of the bag to hold it securely to the protective board. I use my label maker to put a reminder to be careful when removing the print from the mailing board, just in case!


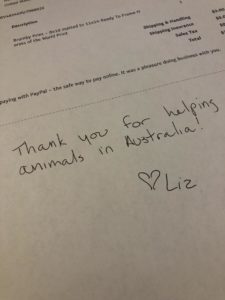
I like to include a packing slip either from PayPal or Etsy, so I print one for each order that I’m working on and use the bottom of the packing slip to write a quick thank you note. Every single order is so precious to me, so I like to include a little hand-written note along with it to express my gratitude.

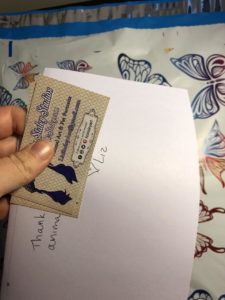
I put two business cards in with the note as well so that my customer has them to give out to anyone else if they wish to do so.


Finally, I print out a label and slip the print (on its protective board), note, and business cards into a pretty butterfly-covered poly mailer. The label goes on the front, and the package is ready to go on to its new home! Sometimes I print out pre-paid USPS labels from Etsy or PayPal, but sometimes I print out a label and purchase postage in the post office, it really depends on if I have time to run into the post office or not that day. Smaller items like wooden ornaments almost always get pre-paid labels, because I can slip those packages into my mailbox and have them picked up. Can’t do that with matted prints, however!

I hope that this look into my print-making and mailing process has helped answer any questions you may have about the quality of my art prints, or about how safe mailing a matted print to you would be. I take pride in making my prints as high-quality as I can and getting them to every customer in great shape so they can be displayed immediately!

Disclaimer: This post includes Amazon Affiliate Links. If you make a purchase from Amazon after clicking one of my links, I receive a small percentage of the sale. This does not cost you anything extra, and helps keep my small business afloat. 


Posted on Leave a comment

Marwari Horse Process Video

Video of me working on the Marwari Horse drawing. In this video I use a lightpadto trace the sketch onto the map page with Copic Multiliner pens. Then the large areas of base color are added with Copic Markers. I use Fantasia Artist Premium Colored Pencils to add additional shading and highlights over the marker. The real-time on this drawing was about 90 minutes (not including the initial sketching of the horse, which I didn’t film).

Thanks for watching, and don’t forget to check out my other blog post with more information about the Horses of the World series!

Posted on Leave a comment

My Recommended Art Books

Often I’m asked what books people can look at to learn more about art and honing their skills. I decided to put together a list of books that have been helpful to me in the past and/or I currently own and refer to often. This is my own personal list of what books I find helpful. These titles may or may not help you in your art journey as well, as all artists are different and learn in different ways. So here are the books that I’ve found helpful in the past!

This list contains Amazon affiliate links. Purchasing items through links in this article gives me a small commission on Amazon (which I will then use to purchase more art books and supplies…)

Drawing On The Right Side of the Brain

This is THE book that I recommend to anyone who says to me “I want to learn how to draw but I have no idea how to get started! I can’t even draw a stick figure!”. I used this book a looooong time ago (like… 1998-long-time-ago) but I can’t imagine that it has changed that much over the years. Drawing On The Right Side Of The Brain teaches you how to switch to “Right-Brain Mode” and see the world as an artist. With lots of easy to complete lessons that won’t take complicated or hard to obtain supplies, this book is accessible and a great start for training your brain how to discern basic shapes and start drawing what you actually see. Note that this is not a comic or cartooning drawing book, but a book on drawing from observation, which is absolutely essential no matter what sort of art you want to do!

I used this book back in high school, as I said. At the time I was a decent (for my age) artist with both drawing from life and cartooning. My skills after doing only half of this book saw a drastic improvement, which is why I absolutely recommend this book to anyone who wants to get start with art.

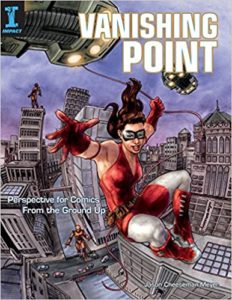
Vanishing Point: Perspective for Comics

Learning perspective is essential for anyone wanting to draw, whether that be drawing comics and cartoons or otherwise. Even drawing the human figure at any angle other than straight-on requires some knowledge of perspective! I got this book for Christmas one year not long ago because I wanted to brush up on my perspective skills for my comic panel backgrounds. Not to sound dramatic, but this perspective book pretty much changed my life. The material is presented in a way that’s easy to understand even for perspective beginners. But there are also tips on advanced perspective drawing that will benefit those who have been drawing in perspective for a long time. I asked for this as a refresher course and got so much more than that, as it taught me tricks for how to make drawing in perspective easier that I had never seen before. The exercises in this book are easy to follow no matter what your level of skill is with perspective.

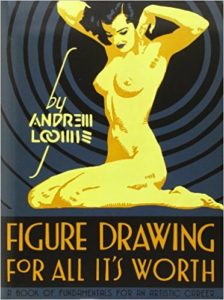
Figure Drawing For All Its Worth

If you want to learn about human anatomy, Andrew Loomis is where it’s at. Not only does this book go over ideal proportions, muscle groups, and features, but it also talks about foreshortening, proportions in perspective, and how to draw the figure in different centers of balance and motion. Not only is Andrew Loomis’ work fantastic to look at, but reading the text is helpful as well since it’s full of tips and tricks.

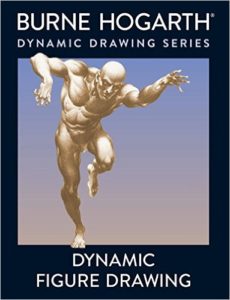
Dynamic Figure Drawing 

Burne Hogarth was one of the first anatomy books I had when I decided I wanted to be an artist back in my high school days. I can remember going to the bookstore and looking at Dynamic Figure Drawing over and over again, coveting it for the longest time before I had the money to buy it. Sadly I either lost or had to sell my copy around the time I was in college or so. But I never forgot looking at the cool dynamic figures with several sets of arms, legs, or heads drawn on a single pose to show the versatility of the pose and to show the human body in motion. This is not just a book of anatomy drawings, but a guide to how to draw the human figure in motion and with foreshortening.

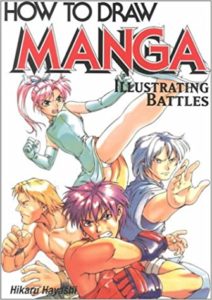
How To Draw Manga: Illustrating Battles

Okay, okay, look, I know that a lot of the How To Draw Manga series is generally regarded as being “garbage”. The thing is though that many of them DO make good reference books. And the other thing is that this book is one of the few out there that actually goes into the theory of drawing all those cool, dynamic fight scenes that we all love in comics and manga. This is another book that I bought back in high school and lost when I was in college. (Maybe I had a book thief sneaking into my dorm at night or something? Or maybe I just loaned my beloved reference books out to the wrong people, who knows.) This book always stuck with me though in my mind because it doesn’t just have nice pictures in it to reference from. The text also describes the theory of why to draw the figures the way they show to illustrate motion. This book covers many topics of drawing battles, from different kinds of unarmed strikes and throws to fighting with weapons and also drawing battle damage on characters. (Doing research for this blog post, I found this book used on Amazon for less than $2 and I confess that I love it so much I bought it immediately to replace my long, long lost copy. I can’t wait for it to get here!)

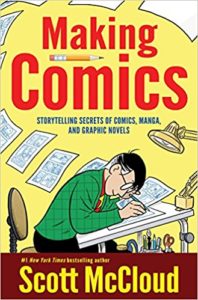
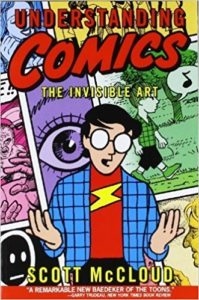
Understanding Comics and Making Comics 

The above header should read “anything by Scott McCloud” but I wanted to give links to actual books. If you’ve ever wanted to understand how and why comics work or don’t work, and the tactics of visual storytelling, Scott McCloud is the guy to read. Plus his books are presented as comics, so they’re easy to read and there’s lots of pictures. It’s a win-win!

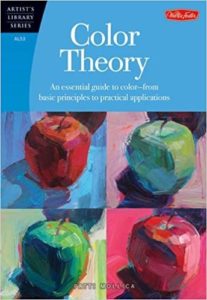
Color Theory: An Essential Guide

This is a short book that is a great introduction to color theory. It introduces the concepts and theories without getting too bogged down in things and making color theory even more confusing than it can be. I still struggle with color theory because it’s such a vast topic with so many variables. But this book is a fantastic primer on the concepts for the beginning artist and I highly recommend it.

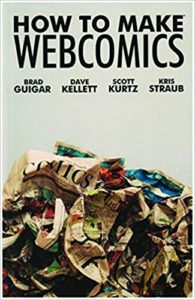
How To Make Webcomics

Okay, so How To Make Webcomics is a little outdated now as far as some of the topics go. There have been so many changes to technology and the convention scene since it came out that the age of this book really shows in spots. That being said, it’s also still a good reference on getting started in the practice and business of making webcomics. You just have to remember to take the advice in it with a grain of salt, because so much of the comics landscape has changed a lot since this book came out. It’s also geared more toward “gag-a-day” strips and so, as the creator of a long-form story comic I found a lot of the marketing type advice didn’t apply to me. It does have sections on writing, creating characters, prepping your comic images for posting, web-site design, site hosting, and interacting with your audience though, and those sorts of topics can be applicable to almost all comic creators no matter what your you’re creating your comics in.

So those are my personal recommendations for books for beginning artists. Have you read any of these books? Which books have you found helpful on your own art journey?

Posted on

Coloring in Manga Studio 5

httpv://youtu.be/aCYgO446aHQ

This week I was asked to make a video about coloring in Manga Studio 5. This is just my method, and of course there’s a million ways to go about coloring. Hopefully some of the methods I use in this video will help you!

Posted on

Using Materials for Repetitive Tasks

httpv://youtu.be/JtIfV07BHZo

In this video I take a cracked pattern for a video screen and then show you how to save it as a material and use it over again on multiple panels across many pages. Using materials for tasks such as this helps with consistency in your story and saves you time!

Posted on

Making Custom Page Templates

httpv://youtu.be/2w_L8q5cf4w

Posted on April 14, 2014, this tutorial video will show you how to make a custom page template in Manga Studio 5. I used the Kablam page template here, but you could use it for any paper or strip size! I go over Finish size, Default border, Canvas size, and how to set a material to the page template. Then learn how to give it a name and save it for use later on!