Prints are an affordable way to collect art that you love. They are generally much cheaper than originals, depending on the printing method, and are usually more accessible than buying originals because there can be as many copies as the artist likes of that piece! Below is the step-by-step process that I use to take an original piece of art and turn it into a high-quality print, and how I safely mail that print to my customers. I like making my prints at home because I can carefully control the look of my prints and make sure that each one is as close to the quality of the original drawing as it can possibly be.
Making the print
Once I have my piece of art complete, I either scan or photograph it so that I can get it into my computer to make prints. For scanning, I use the scan feature on my Canon TS6020 to wirelessly send my image to my desktop. The most important thing to remember when scanning your image is to set the scanner to at least 300dpi so you’ll get a good print from the digital image.
I use the photo setting on my scanner and set the quality to 600dpi, then send the image to my computer.
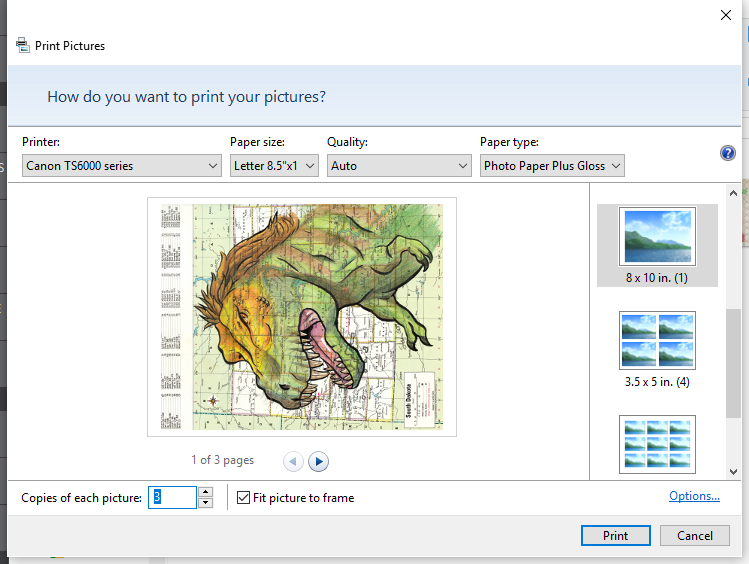
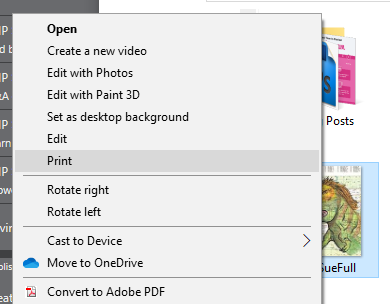
Once my artwork is digitized, it’s time to make a print! Most of the time, I do this through the Print function in Windows 10. I simply open the folder where my image is saved, select the image that I want to print, right-click the file, and select Print.
Windows brings up a printing window with several options that usually suit my needs for simple printing. For the print that I’m creating in this example, I’ve selected an 8×10. Windows will automatically resize or crop the image so that it fits in those dimensions.

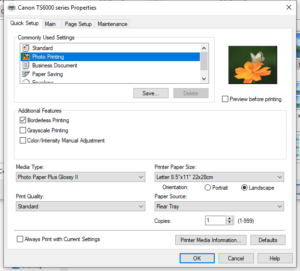
I use a glossy, 230gsm photo paper to print my art on. The Canon TS6020 has a rear paper tray that I use both for photo printing and for printing labels, so I make sure I have my photo paper in the tray. Then in the printer properties, I set the quality to Photo Printing and make sure that the art will print on the paper in the rear tray. Make sure to change your settings to glossy paper for the best results, or your print may turn out streaky!
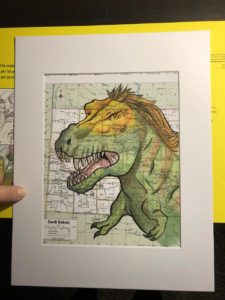
Now that my printer is done, it’s time to mat the print. All my 8×10 reproductions come matted so that they are ready to put into any commercially available 11×14 frame. I used to hate the matting process, but I’ve discovered a trick that makes it a lot less harrowing! I purchase mats for prints in bulk.
To start, I place the print on my desk or a table, with the bottom edge hanging off the table. (You’ll notice that I didn’t trim my paper down to 8×10 after printing. I do this so that I have more “wiggle room” with the matting, but you can trim your print down if you’d like) Then, I place one piece of tape on each corner, with the sticky side of the tape facing UP. It is very important to make sure that your tape is on the backside of your print and that the sticky side is up, or the mat won’t stick to the tape!

Next, take the mat and carefully put it over your art. I don’t put the mat all the way down just yet so that I can be sure it’s as straight as possible, and that there’s no white from the untrimmed paper showing around the edges. I also make sure that I place the mat so that my artist signature is still visible and not cut off. Once the mat is where you want it, set it down and reach under the mat and print to press the tape up onto the underside of the mat.
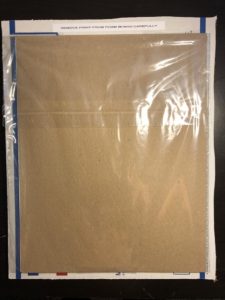
Now that the bottom bits of the print are stuck to the mat, I turn the print and mat over to the backside and put tape around the edges to hold the picture to the back of the mat. And now we just need to put a backing board behind the matted print and put the whole thing in a bag!

My chipboard backs and print bags are made of 100% recycled and sustainably produced materials. I have been trying to reduce my plastic waste over the past few years and using regular print bags made me feel guilty, but I don’t like sending out my work without some protection around it! So when I found these bags from EcoEnclose, I knew I had to have them. They cost a good bit more than the print bags I used to use, but I think it’s worth it to use recycled and sustainable materials.
Mailing the Print
Now that our print is matted, boarded, and bagged, it’s time to ship it out to another happy customer! My most important consideration when mailing a print is having it get to its destination without getting banged up, ripped, or dented.
To start, I take the bagged print and put it face down on a piece of foam board or cardboard. I’m using cardboard in the photo because I ran out of foam board (will have to go pick some up!), but I prefer the thickness of the foam board to regular cardboard. Next, I put a few pieces of tape on the edges of the bag to hold it securely to the protective board. I use my label maker to put a reminder to be careful when removing the print from the mailing board, just in case!
I like to include a packing slip either from PayPal or Etsy, so I print one for each order that I’m working on and use the bottom of the packing slip to write a quick thank you note. Every single order is so precious to me, so I like to include a little hand-written note along with it to express my gratitude.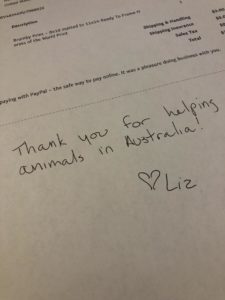
I put two business cards in with the note as well so that my customer has them to give out to anyone else if they wish to do so.
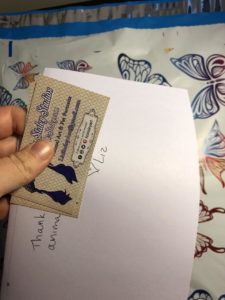
Finally, I print out a label and slip the print (on its protective board), note, and business cards into a pretty butterfly-covered poly mailer. The label goes on the front, and the package is ready to go on to its new home! Sometimes I print out pre-paid USPS labels from Etsy or PayPal, but sometimes I print out a label and purchase postage in the post office, it really depends on if I have time to run into the post office or not that day. Smaller items like wooden ornaments almost always get pre-paid labels, because I can slip those packages into my mailbox and have them picked up. Can’t do that with matted prints, however!
I hope that this look into my print-making and mailing process has helped answer any questions you may have about the quality of my art prints, or about how safe mailing a matted print to you would be. I take pride in making my prints as high-quality as I can and getting them to every customer in great shape so they can be displayed immediately!
Disclaimer: This post includes Amazon Affiliate Links. If you make a purchase from Amazon after clicking one of my links, I receive a small percentage of the sale. This does not cost you anything extra, and helps keep my small business afloat.