Posted on Leave a comment

What I’ve Learned From Horses

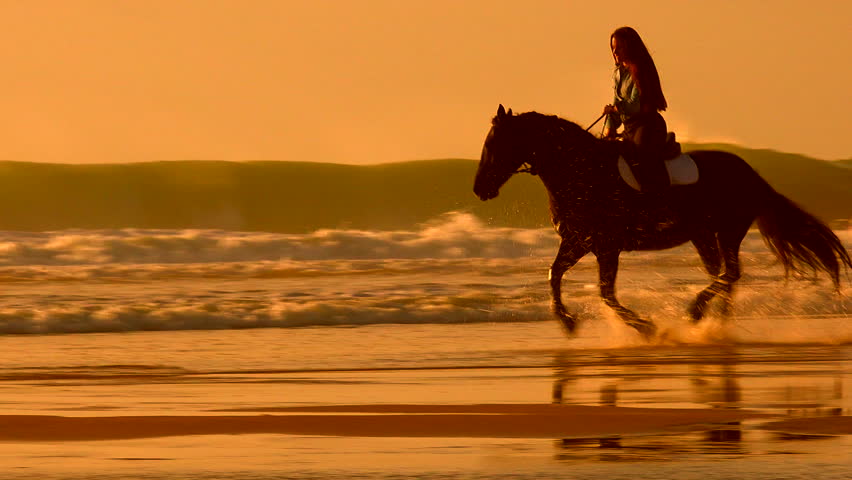
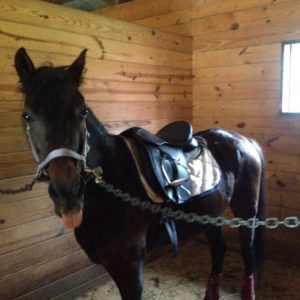
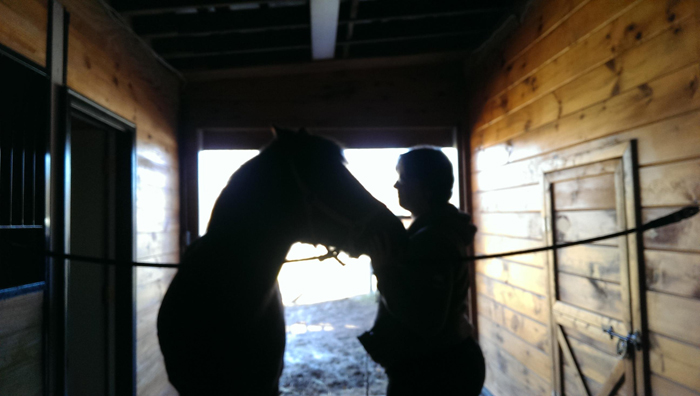
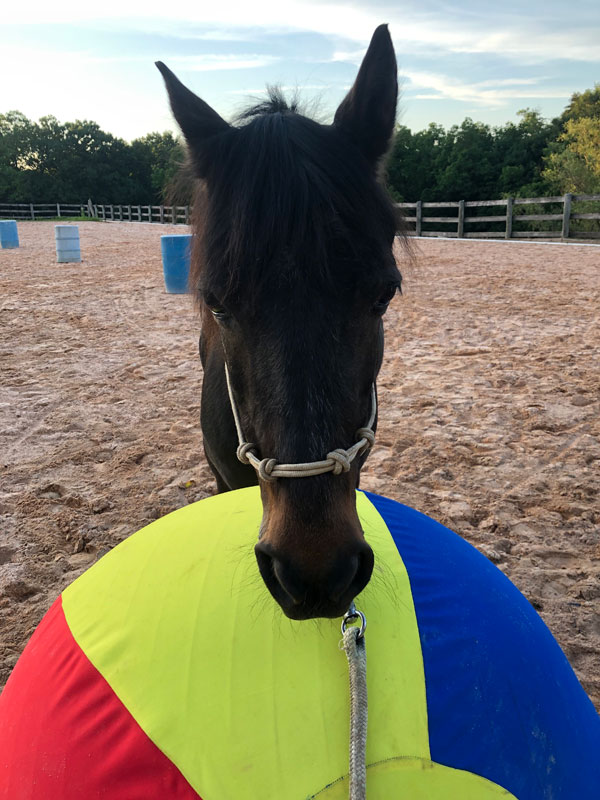
Over the past years that I’ve been able to achieve my dreams of working, caring for, riding, and owning horses, I’ve learned a lot. I read hundreds upon hundreds of pages in books about horses when I was growing up, but even those books couldn’t prepare me for the things that working hands-on with horses would teach me. This list goes beyond such things as general horse care and goes more into the ways I’ve changed as a person because of my contact with equines of all types over the past few years. 

Horses Build Confidence

This one should probably be obvious, but I had no idea the effect that just being around horses would have on my confidence levels. I’m not talking about arrogance, either. Horses are inherently dangerous animals to be around, and you need to be confident to even be on the ground with them, much less ride them. 

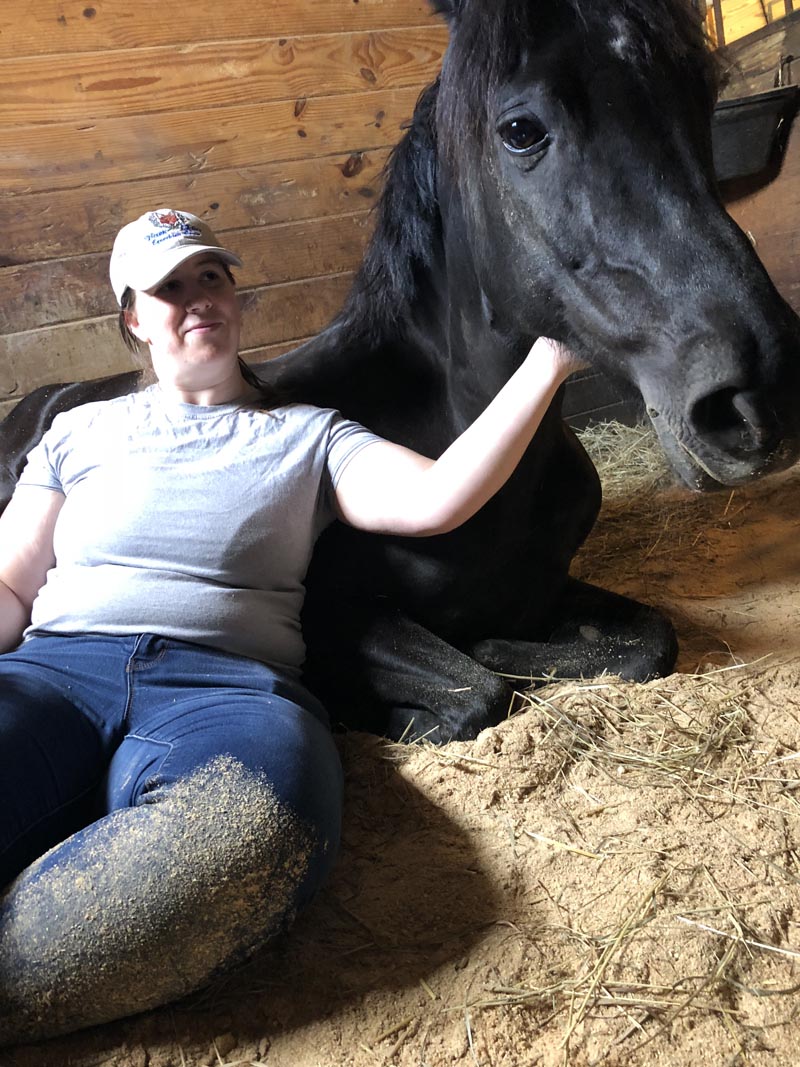
When I first started being around horses, I was scared and timid. I didn’t know what to do to work with them, or even how to properly lead one on a lead rope! It took a lot of weeks of working with Glory on the ground, taught by my best friend, in order to even get to the point where I was confident enough to lunge Glory and make her back up on the lead. 

I have discovered that horses respond to a quiet sort of confidence. They respond to the anxiety of other animals, and as someone with an anxiety disorder, this means that I have to get hold of that around my horse or we are going to have a bad day! The horses I’ve had the honor of working with in my time around them have taught me to be a quiet, confident leader, who is both firm and fair in their decisions. Learning this lesson has helped me in my art career and taught me to stand up and be the leader without giving in to my anxiety.

Tiny Steps Turn Into Big Things

One thing I’ve definitely learned, especially because of setting riding goals, is that small steps forward are better than no steps at all. The first riding goal I ever set was to learn how to canter, and after that I wanted to be able to canter on my horse. Glory has a pretty terrible canter sometimes. She rushes into it, bucks in her transition, she’s off-balance, falls forward, and she pulls herself with her front legs instead of pushing with her hind end. To a person who is a bit timid in general, trying to get her to canter under saddle is downright terrifying. You MUST commit to the canter aid, you can’t be wishy-washy with your aid, and you need to be balanced and breathe. 

So, in order to get to my goal of cantering on my own horse, I had to break every part of getting her into the canter down into small steps. Glory also needed to build her strength and stamina so that she would rush less. Over many, many months, we worked both in the harness and under saddle to build strength at the trot, work on transitions, and I also worked on my canter aids. Then, once I was used to the feeling of her super-fast-trot-that-is-trying-to-be-a-canter, we worked on me getting my aids clear and precise enough that I could get her to canter just a few strides. Once I knew that I wouldn’t die or fall off with a few steps of canter, we worked on getting further and further around the arena, and now cantering on my horse is one of the joys of my riding time. 

Though we may want to get to the end of the road as fast as possible, sometimes we need to break down the trip into small steps and just go forward a tiny bit each day. Eventually, you reach your end goal and grow exponentially in the process.

Be Present and Listen to Your Feelings

Long hours of doing barn chores, riding, and doing all the other things that horses require you to do leaves you with a lot of time to be in your own head. Especially if you’re at a larger barn and spending hours and hours each day doing things all by yourself! Horse care, whether it be mucking stalls, feeding, brushing, or even going for a hack, can be contemplative and quiet. In a world that is becoming more and more noisy, this quiet is invaluable sometimes. 

I’ve found that time with horses has really put me in touch with my thoughts and feelings. If I’m having a bad day, the barn is the best therapy ever. But if I insist on continuing to be in a bad mood after I get to the barn, then therapy is not going to go well that day. Some of the worst days I’ve had around horses are days when I’m in a bad mood and trying to stay in that bad mood. The day I crashed my first cart was a day when I was in a bad mood and didn’t really want to go for a drive, but I did it anyway and ended up destroying a breaking cart. Now, could that have been a coincidence? Sure. But did my bad mood possibly have a hand in distracting me from what I was supposed to be doing? Possibly. 

Horses have taught me to be present in the moment. To reach inside and try to figure out what I’m actually feeling before I get my horse reflecting something I don’t want back on me. If I’m afraid, my horse will be afraid. If I’m calm, Glory will pick up on that and trust me to take care of her.

Speaking of trust…

Trust In Others

Working with horses requires a lot of trust, not only in the large prey animals that you’re working with but also in the other people that you can encounter along the way. In order to begin doing things with Glory, we had to learn how to trust each other. She had to know she could count on me to not lead her into harm, and I had to learn how to read her body language and adjust my own so we could communicate. Earlier, when I was talking about learning how to canter on Glory, I left out the fact that we had to learn not only the physical way to get to the canter but also learn to trust each other at that gait. I had to trust that Glory wouldn’t throw me off and run away, and she had to trust that I was ready to go. 

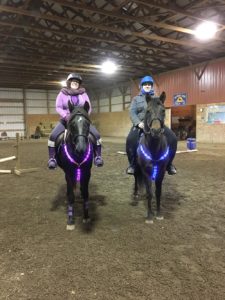
Because of the way my childhood friends treated me, I found it hard to really trust people for a long time. For most of my life I’ve had only small groups of friends, and most of them I would keep at a little bit of a distance out of fear that someone would turn around and hurt me. But if you aren’t keeping your horses on a personal piece of land and doing all their care yourself, while teaching yourself to ride, then you HAVE to trust others. For several years I kept Glory at a boarding barn, and though I worked there 5-6 days a week and could make sure she was being taken care of, I had to trust that she would get her dinner, would be fed and taken care of in the hours I wasn’t there and on my days off. Later on, when I stopped working at the barn I kept her at, I had to trust even more that my horse would be taken care of. In a boarding barn, you need to trust that other people will respect your property and respect the facility so that it’s all in good working order to be used. And now that my best friend and I do self-care for our horses, we each have to trust that we’ll do what needs to be done to take care of our girls when the other person isn’t there and make informed decisions on what they need.

I’m happy to say that today I have a great group of wonderful friends who I trust, all because of horses!

Accept the Things You Cannot Change

Riding a horse isn’t like running marathons or playing soccer. Your teammate in equestrian sports is a huge prey animal with a fight-or-flight instinct, a distinct personality, and a mind of its own. Even after you’ve gained their trust, worked with them, and taken the baby steps, sometimes your time with your horse just might not go as planned. Horses have bad days, they have days where they’re tired, cranky, or just want to go back to the barn and eat instead of being ridden. You have to pick your battles when you’re around horses. It’s a delicate balancing act to be both assertive and caring, to be a leader and also to know the limits of your team. 

Because of horses, I have learned that sometimes you just need to know when you’ve done all you can do. You can have a plan for your ride or your groundwork session, and your horse just might not be feeling it. In those cases, you have to learn to be flexible and patient. You don’t have to give up on those bad days when things aren’t going to plan, but learn how to adjust the plan so that you can achieve a different or smaller goal. If you can’t get your horse to canter the entire way around the arena, go for a small circle, or one side of the arena, and be happy with that. This goes hand-in-hand with the second lesson I talked about, where you sometimes must take small steps in order to get to the big goals.


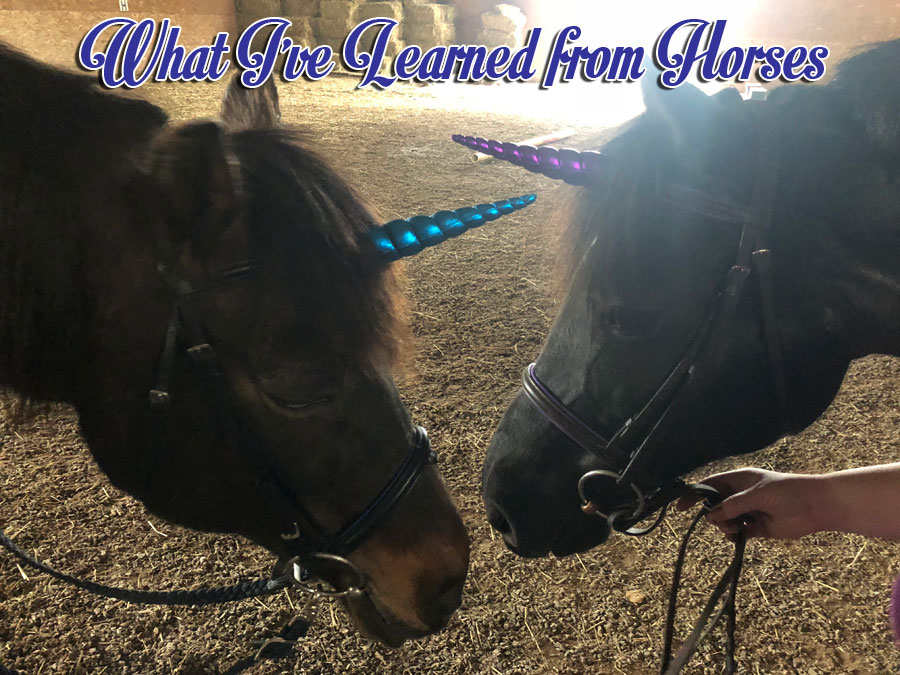
Those are five things that working with horses have taught me. I’m sure I could come up with a hundred more, but those are the five biggest ones that I’ve noticed have an impact on me even in my non-horsey life. What lessons have horses taught you? Let me know! 

Posted on Leave a comment

Longer Living Through Art?

I was browsing for art news last week and stumbled across an interesting article on a site called Newser, which is apparently a site that curates news from various sources and writes easily-digestible “news briefs” about the story on their own site. Anyway, according to this article, a study was conducted to discover if exposure to the arts has any effect on lifespan.

According to the study, which was published in the BMJ, over 6700 subjects over the age of 50 when the study started were then tracked over the next 14 years. The study tracked how often the participants in the study were exposed to the arts, and how many had passed away by the end of the study. 

After controlling for other factors, the researchers found that the subjects who engaged in the arts “frequently” (at least once every few months) had a 31% lower risk of dying compared to those who never engaged in the arts. Even those who only went to an art-themed event only once or twice a year had a 14% less risk than non-engagers. 

Theories on this correlation include arts lovers being more engaged with the world at large, less sedentary, more empathetic, and less lonely, which are all factors in living longer. 

As amazingly cool as this study is, I think it’s pretty much a “No Duh!” moment for me. Despite the fact that the arts are usually the first thing cut at schools, there’s no doubt that they are extremely important. But it is nice to have a study to point to that can quantify, at least somewhat, just how important the arts are.

Creating a new piece of art, writing a story, listening to a beautiful piece of music, seeing a good movie, going to a concert, looking at something inspiring created by a fellow artist, or reading something that captures the imagination are all things I can personally count on to help with my depression and anxiety. Sometimes, when I’m feeling depressed, the best thing I can do is get out my pencils and put on some music that I love, and just get it all out in my work while I sing along at the top of my lungs. (Be glad you aren’t my neighbor, because I am not a great singer. Sorry to all my current neighbors who may have to deal with hearing me singing along to whatever music fits my fancy at the moment.)

Being an artist and being involved in art has also done wonders for my social anxiety. Joining an artist cooperative has given me a pool of other artists to gain wisdom from, and I can also teach them the things that I know. It’s lovely to know that I have a group of people with similar interests and who all have similar goals. Art means that I always have something in common to talk to my fellow co-op members with. Also, when I do a convention or a craft fair, I don’t have to be afraid to be out in the crowd, because anyone who shows an interest in my wares probably has similar interests to me, so I can talk to them about something. 

So, in my personal experiences, art of all kinds helps with my depression and anxiety, makes me more social, improves creative thinking and keeps me learning, and gets me out of the house when I maybe wouldn’t necessarily want to go be in a crowd of people. 

I guess this study just proves I’m going to live forever! What positive impact has art had on your life?


Title Image Courtesy of AenagGaz on DeviantArt.

Posted on Leave a comment

Come Tour Our Tack Room!

A tour of our tiny tack room might not be particularly exciting to those who have much larger barns or a fancier set up. But I think our tack room is quaint and that we make decent use of what space we have. Besides, maybe this post can give someone some storage ideas for their own tack room! (Also, does anyone not realize how messy something is until they look at photos? Because that’s what I’m going through right now with this post, but I didn’t have time to straighten up when I was taking these photos. So please know that I share my unedited life with all of you!)

Welcome to our little tack/feed room! This is the view from the door. On the left wall are the cart harness that we use for both horses, extra lead ropes, rope halters, breastplates, and all our light-up riding gear (LED Breastplates, LED tail lights, magnet running lights to clip onto the breastplates, etc). Directly ahead, in the trash cans, are our feed, extra horse treats, alfalfa pellets, and extra bags of feed. You can see Raven and Glory’s feed buckets on top of the middle can in this shot. We keep the feed in here because we have a small space heater in the tack room and the feed that we use has molasses in it, so if it freezes we will be trying to break it up with a chisel!

Now, some people who are familiar with tack rooms might be thinking “why is there a huge tool box in the corner of your tack storage?!” Well, the short answer is that the barn we’re currently at was empty for a few years, and so the tack room and stalls started being used for storage. There are some things still being stored in the barn that we’re not able to move and that we just have to live with. The huge tool box is one of those things. It’s impossible to move it out of there right now, so it gets to stay. We have some silicone mats on top of the toolbox to protect it, and we store our Bluetooth speaker, charging cables for our phones, more extra treats (presents from my parents, because they must spoil their “grandhorse”), and an electric kettle for making warm mash for the horses or hot drinks for ourselves.

Here’s a better shot of the wall with the harness and night-riding things on it. We keep the harness on a holder meant for a garden hose. It holds the breastcollar and the harness saddle perfectly, and we put the other harness parts on a bridle hook to the side of it.

Over in the far corner of the tack room are our saddles and saddle pads. My saddle is on the top left rack (because I am tall and can reach that rack), extra saddle pads go on the top right. Kennedy’s saddles go on the lower racks. We also put our helmet bags here so that we can grab a saddle, saddle pad, and our helmet and take it all out to the crossties in one trip.

This wall is fairly empty because we moved most of the stuff that was here over to the other wall when we were planning on having our heat come from an outlet heater. So we had to move everything away from the outlet so there wouldn’t be a fire hazard. Then we decided to use the heater we have now, instead, and we’ve just kept this wall mostly clear. Our primary bridles for each horse do live on this wall, however, within arm’s reach of the saddles. Because we are about efficiency and I like being able to grab all my tack at once!

Eagle-eyed readers have probably noticed the curtains in the tack room by now. Yes, those curtains are made with “Horses of the World” fabric, and I sewed them myself! It only seemed fitting to have some of my horse art in the tack room, after all. The curtains are lined with a thermal fabric that blocks out the heat in the summer.

Continuing to turn around toward the right, you come to the tack closet side of the room. To the left is a whip holder with our various crops, lunge whips, dressage whips, and other such things on it. Below those are our pool noodle horses. What? You don’t have pool noodle horses in your tack room?

Last year, a friend of ours wanted to have a pony-themed birthday party, but all our horses aren’t at the same barn anymore. So instead we turned pool noodles, ribbon, googly eyes, and craft foam into “hobby horses” that we could ride during the party. Each one is actually modeled off of our real-life horses and we put a different facial expression on each to reflect that!

The tack closet has items like bathing supplies, extra helmets, quarter sheets, stable sheets, trailering items, road hack safety items (reflective quarter sheets, reflective vests, etc), and our plush unicorn horns in it. On the door is a shoe organizer from Walmart that holds the everyday grooming supplies that we don’t want to freeze in it, like our leave-in conditioner spray, vet liniment, antibacterial wipes, and stuff like that. We also have fly masks, fly bonnets, sport boots, Glory’s extra medicine, paper towels, leather cleaner, and headlamps for checking on the paddock in the dark in the organizer. This keeps our items in the warmth, but also easily accessible since we just have to come one step in the door and reach around the corner to grab whatever we need.

And that is our little tack room! I hope you enjoyed looking around with me. Do you have a cool tack room? Share some images with me!

(Chalkboard in the featured image is from this DeviantArt user: https://www.deviantart.com/boldfrontiers/art/Chalkboard-Frame-824354197 )

Posted on Leave a comment

How to Make Custom Notepads – Tutorial Video!

I made a custom notepad this past week to get my work days organized, and got a lot of questions about it on social media! So I filmed a tutorial. It’s a really simple project and you can use any papers you like to do this with. I hope you like the video and that you have fun making some custom notepads!


Posted on Leave a comment

Top Three Horse Myths I Used To Believe

I didn’t realize until I became a horse owner just how many myths there are about horses. Many of those myths I thought were true until I actually gained experience riding and working with horses because I didn’t know any better! So here are my top three horse myths that I believed until I had a horse of my own.

Horses do all the work when you ride them

I remember watching old movies where some rich, old, overweight man would say “The doctor prescribed horseback riding for exercise,” and I would think that made no sense. Surely sitting on the back of a horse and letting it run around couldn’t possibly be exercise for anyone but the horse! It didn’t make any sense to me at all when I was younger.

Then I started learning how to ride and I realized just how wrong I was. Horseback riding is a full-body sport that develops strength, provides cardio, improves balance and flexibility, and requires a lot of coordination to do well! Even riding at a walk requires a lot of balance, lest you slide right off and hit the ground. Posting a trot is a leg workout plus cardio for me as well, and oh boy do my thighs let me know if I’ve done a lot of trot on my ride the day before. Riding canter has improved my core and back strength as well, and I’m always out of breath and my heart rate is up after a good ride. So yes, horseback riding IS a workout and the horse does not do all the work!

On a related note, I also had no idea how much work I’d have to do and how long it would take to be able to walk/trot/canter. I was three years into my riding journey before I did my first canter!

Only the super-rich can have a horse

Don’t get me wrong: horses are EXPENSIVE. Between feed, hay, farrier, vet, dentist, tack, blankets, grooming supplies, and everything else you need for a horse, they are definitely not a cheap animal to have. However, there are ways to make having a horse more affordable for a regular person, so they aren’t just for the extremely wealthy (as I used to think!).

One of the best ways to reduce your horse expenses- and your carbon footprint- is to buy some items second-hand. The internet has made this much easier, and I’m part of several Facebook groups where people can sell, buy, and trade tack and apparel they no longer need. If you choose to blanket, you can find all sorts of blankets being sold online, and second-hand saddles can be much more affordable than buying one new.

My first riding lessons were ones that I paid for by volunteering at the riding school. When Glory first became mine and I wanted to move her to a boarding facility, I worked out a deal with the owners so that I could exchange my board fee for stall mucking five days a week. I have exchanged custom horse portraits for tack or other items that I needed. These trades all made having my horse possible, even on a budget. There is a great blog and YouTube channel called The Budget Equestrian that has a ton of ideas for keeping a horse on a budget as well!

Something that we never skimp on, however, is hay. Our horses get the best quality hay we can find. We do save a little money per bale by going to pick up the hay ourselves though instead of having it delivered. 

Horses Don’t Lay Down Unless they’re Sick

This myth is so prevalent that I’ve even heard it from people who don’t have horses or have never been around horses! Some people just think that horses sleep standing up all the time and they don’t lay down unless something is very wrong. This is very wrong, apparently!

Horses can sleep standing up, but they do also lay down to sleep. They lay down to sleep only when they’re very comfortable and feel safe, though. Glory likes to have an afternoon nap if she has something nice and soft to lay down on, preferably in the sun. I have also caught her and Raven napping in their stalls as well when they’re bedded nice and thick and they can get comfortable. 

Me with a napping Raven


Posted on Leave a comment

Introducing the Birthstone Horses!

If you follow me on social media, you’ve seen my new series of horses I’ve been working on this year – Birthstone Horses. These are horses with coloring based on the birthstone associated with each month, and they also are bordered on two sides with sprigs of the monthly flower as well. I’ve been having so much fun working on this series so far. Actually, the original plan was to do one design a month throughout the entire year, but after I started working on the first one I was having so much fun that I just kept going. 

As of the time I’m writing this, I have 4 Birthstone Horses designs complete and am halfway done the fifth one. I’d like to introduce you to the first four designs and tell you a bit about the eight designs that are coming up in the series as well.

Garnet (January)

The first stone of this series is the Garnet. Garnet has been a popular stone in jewelry for a long time and has even been found used as beads in a necklace from 3000 B.C. The name of this dark red stone comes from the Latin word “Garanatus”, meaning “seed-like.” The gem likely got this name because small ones look like the small seeds that would be found inside of Pomegranate. Bohemia, which is now a part of Czechoslovakia, was a prolific source of Garnet. Many Bohemian castles and churches were decorated in Garnet. The stone was also popular in Victorian jewelry. It is said that Garnet is a powerful stone for curing many ailments, especially blood ailments, because of its deep red color.

Click the picture to buy a print of this work!

The January flower is the Carnation, which I chose to also color in the same reds as the horse of this January design. The Carnation has a history which dates back at least 2000 years. The January flower represents gratitude, beauty, pride, divine love, and feminine energy. Carnations have a dense, hardy core surrounded by feathery soft and delicate petals. 

Amethyst (February)

Amethyst once was a stone that could only be worn by royalty. Amethyst is included in royal collections all over the world, from Ancient Egypt to modern Britain. It was once more prized than ruby and sapphire. The name Amethyst comes from the ancient Greek word “amethustos”, meaning sober. It was believed that wearing one of these beautiful purple stones would prevent the wearer from becoming intoxicated. The stone has also been associated with controlling evil thoughts, increasing intelligence, and even keeping warriors safe on the battlefield!

Click the picture to buy a print of this work!

The flower that is associated with February is the Violet. Violets were cultivated around 500 B.C. by the Greeks. Today, there are over 500 species of violet, including those known as “pansies”. Violets symbolize modesty, spiritual wisdom, faithfulness, and humility.

Aquamarine (March) 

The third design in this series is the first one where the stone and the flower weren’t the same color, so I was nervous to get going on this one. However, once I started coloring I realized that this combination of light blue and brilliant yellow was just gorgeous!

In the 19th century, the more green varieties of Aquamarine were the most popular. But now the more blue stones are the most desired. The largest Aquamarine stone ever found was discovered in Brazil in 1910, and weighed 243 pounds. Greeks and Romans knew the stone as the Sailor’s Gem, and it would ensure safe passage across stormy seas. In 1377, the stone was widely regarded as a cure for poison, and it was said that even wearing the gem as a pendant or ring would work. It was said that Aquamarine could cure many ailments, including stomach upset.

Click the picture to buy a print of this work!

The Aquamarine horse is bordered by March’s flower, the Daffodil. Daffodils are associated with new beginnings and the coming of spring, since they are one of the first flowers to bloom after winter’s frost. They are grown all over the world and have been the subject of poems and songs. In China, the Daffodil symbolizes good luck, prosperity, and good fortune. 


Diamond (April)

Diamond gets its name from the Greek word “adamas”, meaning “invincible”. Diamonds come in a wide range of colors, including black, blue, red, pink, purple, and yellow. The color of a diamond is influenced by the impurities present in the stone. Diamonds are one of the hardest substances on earth, and wearing one is thought to give the wearer better relationships, inner strength, balance, clarity, and abundance. Some ancient peoples believed that diamonds were created by lightning, or that they were the tears of god. During the Middle Ages, diamonds were thought to have many healing powers, and to cure ailments of the brain and pituitary glands. It was believed that heating a diamond and taking it to bed with you would draw toxins from the body. Diamonds are the king of birthstones, and are the most widely sought after gems.

Click the image to buy a print of this work!

The Daisy is the flower of April. Daisy captures the essence of Spring’s happy-go-lucky energy. Daisies also symbolize purity and innocence. In Norse Mythology, the Daisy is Freya’s flower. Because of this, Daisies were often given to new mothers. The Daisy is a composite flower, meaning that they are actually two flowers in one. The inner section is a disc floret, and the outer section is a ray floret. Because of this, Daisy also symbolizes eternal love. The phrase “fresh as a Daisy” comes from the petals of the Daisy closing over the center during the night and then opening again in the morning. 


Future designs

I will be continuing to do more Birthstone horses until I have all twelve months complete. Here is the list of stones and flowers I’m planning, broken down by month.

May – Emerald and Lily of the Valley

June – Pearl and Rose

July – Ruby and Water Lily

August – Peridot and Gladiolus

September – Sapphire and Morning Glory

October – Opal and Calendula

November – Topaz and Chrysanthemum

December – Turquoise and Holly


If there is interest, I definitely want to create a set of notecards and possibly a 2021 calendar with these designs once they’re finished! T-shirts of the first four designs are available and prints will be listed for purchase from my online shops soon as well. They would’ve been up already but I ran out of the plastic bags I put matted prints in to protect them and I’m waiting for my new shipment to arrive. 

Posted on Leave a comment

Art I’d Love To Try

Sometimes I feel like I have artistic ADD. I like to go from new art project to new art project, experiment with styles, mediums, subjects, and even going to completely different types of art! I’ve probably tried more different types of art than I can even remember, but there’s always something more that I’d like to try. In a perfect world where I had infinite time, money, and resources, these are the types of art that I’d love to try.

Leatherworking

I can remember looking at Tandy Leather catalogs and drooling over the leather stamping and carving tools when I was as young as middle or high school. I used to love getting those leather craft kits where you’d make a bag or a medicine pouch from pre-cut and punched pieces. But I always wanted to get the mallets and design stamps and make the elaborate, beautifully tooled pieces I’d see in the catalogs. I still love the look of tooled leather- have you ever seen the English saddles that are tooled like fancy Western ones? They’re amazing!- but haven’t ever had the time, money, or space to get into the craft. Maybe one day, but for now I will admire all the gorgeous works of leathercraft that talented makers create!

Photo from Parisot Sellier

Pottery

When I was in high school, we went through a stint of being interested in sculpting, specifically with polymer clay. I’m not gifted with sculpting, but sometimes it is nice to make something that’s got a third dimension to it. In my high school art classes we would sometimes do clay projects where we’d make pots using different techniques, none of which turned out well for me. I remember a coil pot that came out of the kiln having fallen over and was very sad looking. But even though I haven’t had a lot of luck with pottery, I’ve always wanted to try throwing a pot on a wheel. I don’t know if that fascination is because I watched “Ghost” a lot as a kid (Even though the ending of it terrified me and gave me nightmares) or what, but I’ve just always thought pottery wheels look like a lot of fun. A giant mess, but a lot of fun!

Bookbinding

My first job out of college was at an Office Depot, working in the copy center. I actually really liked that job, even though the copy machines constantly seemed to break and I attracted all the crazy customers, because I got to be creative sometimes and because I had access to all the really fun machines. One of the things I really liked doing was bookbinding, especially with the Perfect Binding machine that we had. You’d put the papers into the machine with the side you wanted to be the spine facing down, then load in a tape strip. The machine would hold the papers in place, heat the glue on the tape strip, and then fold the tape strip around the papers to make a book. And I loved it! I thought it was just the coolest thing, and I’ve wanted to try other forms of bookbinding ever since. I have a sketchbook that a friend made me a few years ago and he sewed the registers by hand. It’s one of my favorite possessions and I kinda can’t bring myself to really use it because it’s so special. So anyway, this is a long-winded way of me saying that I’ve always wanted to try other forms of bookbinding so I could make my own books and sketchbooks.

Image from Wikipedia

Music

I don’t think there’s one member of my family that is musically inclined. I had a cheapo recorder as a kid with a book of songs from Aladdin, but I wasn’t ever actually good at it. I’ve always wanted to learn how to play an instrument, preferably the piano/keyboard or the guitar. Keyboard might be better because it would require a little less finger strength (I’d assume?) and sometimes my hands ache just from working on a piece of art. Hopefully one day I’ll get a chance to play around with learning something, even if I can only play one song.

Woodworking

Am I the only one who loves putting together those cheapo furniture things? There’s something so very satisfying about creating something that’s useful, like a bookshelf or a desk. Which is why I’d love to learn how to do woodworking someday. Thankfully, I have a Dad who is willing to teach me how to use power tools, so this one is a definite possibility. I might be able to make something other than a particle-board bookcase at some point!

Are there any types of art or crafts that you’d like to learn? Let me know!

Posted on Leave a comment

My Riding Ambitions

Usually, at the beginning of the year I have a new riding goal or two to work toward, but this year I don’t really have a new goal to go after. My goals in the past have been fairly simple, like “learn how to canter” or “canter my horse across an open field” (That one ended in a broken helmet, it wasn’t pretty), so probably not the types of riding goals that most people would have. 

I’ve never been very competitive, so showing or going to grand competitions just doesn’t speak to me. Maybe if I’d started riding at a much younger age I would be more interested in shows and competitions, but I’m more interested in having fun with my horse and my horse friends.

That being said, there are a few riding items on my bucket list that I’d love to do!

Riding on the beach

One of my top riding ambitions is to go for a horseback ride on the beach someday. I love to watch videos of people cantering or galloping down the sand on a horse, with the waves crashing in the background, and it’s just so magical to me! So, one day I’d love to take my horse to the beach and have a nice good run down the sand. Maybe not as fast as a gallop, because that’s a bit scary to me, but definitely a nice canter down the beach would be lovely, especially if my horse friends are with me and we can share the experience!

Taking my horse on trail rides

I’m fortunate enough to live in an area with lots of great places to go for trail rides. I live in driving distance of Gettysburg, the C&O Canal, and many parks that have horse trails the public are allowed to use. I get bored riding in the same arena or fields all the time, so going on trail rides would be an amazing thing to do, and we have so many areas around here that are perfect for it! Unfortunately, we are currently without access to a horse trailer, so trailering anywhere for a ride isn’t in the cards at the moment. We are hoping that we can find an affordable trailer this year so that we can take advantage of some of the beautiful parks in the area before our horses get too old to ride the trails!

Learning more about Dressage

When I do need to ride in the arena, I like to ride with a purpose. I try to have a goal for most of my rides, even if that goal is just to not fall off the horse, or to just get one good trot to canter transition in each direction. The instructor I had when I first started learning to ride liked to use dressage patterns, and I always loved that! I feel like practicing even simple dressage tests can improve steering, riding accuracy, and riding gait transitions. I have a goal to make a set of dressage letters for our riding arena so that we can start doing dressage patterns. I have the wood, I just need to paint it. Hopefully, I can get that project done by Spring!

Try Bitless riding

Glory can be very sensitive in the mouth and she can be pretty picky about her bit. We use a very simple bit that she seems to love, but I’d really like to try a bitless bridle. I think that Glory would be happy without a bit, and she has enough “whoa” and less “go” than Raven, so she might be a great candidate for bitless riding. 

Photo from UltimateBitlessBridle.com

Do lots of fun stuff on horseback!

I would also love to do more fun things on horseback, like obstacle course type things (opening/closing gates, picking up poles and moving them, moving balls around, etc) and I’d even like to try mounted archery! I might eventually take Glory to a fun schooling show, or go on a hunter pace with her, but mainly I just want to have fun with my horse and my friends. That’s the best thing about having a horse, if you ask me!


What are your riding ambitions?


Posted on Leave a comment

How I Make and Mail Art Prints

Prints are an affordable way to collect art that you love. They are generally much cheaper than originals, depending on the printing method, and are usually more accessible than buying originals because there can be as many copies as the artist likes of that piece! Below is the step-by-step process that I use to take an original piece of art and turn it into a high-quality print, and how I safely mail that print to my customers. I like making my prints at home because I can carefully control the look of my prints and make sure that each one is as close to the quality of the original drawing as it can possibly be.

Making the print

Once I have my piece of art complete, I either scan or photograph it so that I can get it into my computer to make prints. For scanning, I use the scan feature on my Canon TS6020 to wirelessly send my image to my desktop. The most important thing to remember when scanning your image is to set the scanner to at least 300dpi so you’ll get a good print from the digital image. 

I use the photo setting on my scanner and set the quality to 600dpi, then send the image to my computer. 

Once my artwork is digitized, it’s time to make a print! Most of the time, I do this through the Print function in Windows 10. I simply open the folder where my image is saved, select the image that I want to print, right-click the file, and select Print.

Windows brings up a printing window with several options that usually suit my needs for simple printing. For the print that I’m creating in this example, I’ve selected an 8×10. Windows will automatically resize or crop the image so that it fits in those dimensions. 

I use a glossy, 230gsm photo paper to print my art on. The Canon TS6020 has a rear paper tray that I use both for photo printing and for printing labels, so I make sure I have my photo paper in the tray. Then in the printer properties, I set the quality to Photo Printing and make sure that the art will print on the paper in the rear tray. Make sure to change your settings to glossy paper for the best results, or your print may turn out streaky!

Now that my printer is done, it’s time to mat the print. All my 8×10 reproductions come matted so that they are ready to put into any commercially available 11×14 frame. I used to hate the matting process, but I’ve discovered a trick that makes it a lot less harrowing! I purchase mats for prints in bulk.

To start, I place the print on my desk or a table, with the bottom edge hanging off the table. (You’ll notice that I didn’t trim my paper down to 8×10 after printing. I do this so that I have more “wiggle room” with the matting, but you can trim your print down if you’d like) Then, I place one piece of tape on each corner, with the sticky side of the tape facing UP. It is very important to make sure that your tape is on the backside of your print and that the sticky side is up, or the mat won’t stick to the tape!

Next, take the mat and carefully put it over your art. I don’t put the mat all the way down just yet so that I can be sure it’s as straight as possible, and that there’s no white from the untrimmed paper showing around the edges. I also make sure that I place the mat so that my artist signature is still visible and not cut off. Once the mat is where you want it, set it down and reach under the mat and print to press the tape up onto the underside of the mat.

Now that the bottom bits of the print are stuck to the mat, I turn the print and mat over to the backside and put tape around the edges to hold the picture to the back of the mat. And now we just need to put a backing board behind the matted print and put the whole thing in a bag!

My chipboard backs and print bags are made of 100% recycled and sustainably produced materials. I have been trying to reduce my plastic waste over the past few years and using regular print bags made me feel guilty, but I don’t like sending out my work without some protection around it! So when I found these bags from EcoEnclose, I knew I had to have them. They cost a good bit more than the print bags I used to use, but I think it’s worth it to use recycled and sustainable materials. 

Mailing the Print

Now that our print is matted, boarded, and bagged, it’s time to ship it out to another happy customer! My most important consideration when mailing a print is having it get to its destination without getting banged up, ripped, or dented.

To start, I take the bagged print and put it face down on a piece of foam board or cardboard. I’m using cardboard in the photo because I ran out of foam board (will have to go pick some up!), but I prefer the thickness of the foam board to regular cardboard. Next, I put a few pieces of tape on the edges of the bag to hold it securely to the protective board. I use my label maker to put a reminder to be careful when removing the print from the mailing board, just in case!


I like to include a packing slip either from PayPal or Etsy, so I print one for each order that I’m working on and use the bottom of the packing slip to write a quick thank you note. Every single order is so precious to me, so I like to include a little hand-written note along with it to express my gratitude.

I put two business cards in with the note as well so that my customer has them to give out to anyone else if they wish to do so.


Finally, I print out a label and slip the print (on its protective board), note, and business cards into a pretty butterfly-covered poly mailer. The label goes on the front, and the package is ready to go on to its new home! Sometimes I print out pre-paid USPS labels from Etsy or PayPal, but sometimes I print out a label and purchase postage in the post office, it really depends on if I have time to run into the post office or not that day. Smaller items like wooden ornaments almost always get pre-paid labels, because I can slip those packages into my mailbox and have them picked up. Can’t do that with matted prints, however!

I hope that this look into my print-making and mailing process has helped answer any questions you may have about the quality of my art prints, or about how safe mailing a matted print to you would be. I take pride in making my prints as high-quality as I can and getting them to every customer in great shape so they can be displayed immediately!

Disclaimer: This post includes Amazon Affiliate Links. If you make a purchase from Amazon after clicking one of my links, I receive a small percentage of the sale. This does not cost you anything extra, and helps keep my small business afloat. 


Posted on Leave a comment

My Favorite Horse Photos

Over the past six (almost seven!) years that I’ve been around horses, I’ve taken and collected a lot of horse photos. Not only is my horse cute, but I’ve worked around a lot of horses and I’m always needing new reference photos to create art from. So I thought it would be a lot of fun to post some of my favorite photos, both that I’ve taken myself and ones that I’ve collected from around the internet. I hope you enjoy!

My Glory as a baby!

First of all, look at how adorable my Glory was as a baby! Isn’t she the cutest thing ever? She had a sassy face even at just a few days old!

Glory’s Sire, Edelweiss Magic Man

Speaking of Glory, this is the best photo that I have of her sire, Edelweiss Magic Man. I have a couple photos of him from the people that bred her, but they are terrible and the colors have deteriorated over the years, so this is the clearest picture I have of him. Glory definitely gets her good looks from her Papa, because she looks nothing like her Dam!

Horse with gloves on its ears

Now for something completely different! This gif never fails to make me giggle with delight, so I look at it whenever I’m feeling down in the dumps. There’s just something so perfect and so ridiculous about the way that the gloves sit on the horse’s ears and the way that they move and it makes me very happy!

Glory in the Snow

This photo of Glory is from our first winter together, I think. We were having a walk around the arena (this was before I started riding her, so I was hand-walking her) and she just stopped and looked out over the freshly fallen snow. It was so pretty that I actually did a watercolor painting of this photo at one point that I think my mom now has.

Life with a horse: a summary

When I first got a tablet, I downloaded a horse game. The most realistic thing about that game was that you could brush your horses every ten minutes, and every ten minutes they would be covered in mud and dirt. This meme reminds me of that game.

Chaz

This photo was taken by me and is of one of the many horses I worked with at my first barn job. He’s a Morgan gelding we called Chaz, and he was just the best. A sweet boy with a great personality. This photo was from one of his first days on the farm, and he was running around with his head up, snorting and carrying on, and I always thought this picture looked like it should be on the front of Morgan Magazine. I miss this horse very dearly, he was a sweet soul and I think about him often.

Glory’s opinion on riding

This was the face Glory made after I bought my first saddle and was trying it on her. I owned this saddle for a few years but ended up selling it and saving for a different one that I use now. This was an 18 inch Wintec Wide and I’ve since gone down to a 17 inch Wintec All-Purpose. I took these pics and didn’t notice until I looked back at them that Glory was sticking her tongue out in this one!

Squishy Lips!

I found this photo on Tumblr a long time ago and it has never failed to make me laugh. I just love those big squishy lips! Bless the person who took this photo, it has brought me so much joy!

Me, Glory, Kennedy, and Raven

One last photo, because if I don’t put a limit on this we’ll be here all day. I love this photo of me and my best friend Kennedy riding our girls. This was right after we got our light-up breastplates and it was just so much fun to ride in them. Honestly, it still is fun to ride with lights on the horses and sometimes we put them on just because. (And sometimes we put them on because it gets dark very early now and we need to ride, but it’s already nighttime, so we need lights)

I hope you enjoyed looking at some of my favorite horse photos! Do you have a favorite horse picture? Share it with me!